How to Use a Pull-Through Knife Sharpener?
A dull knife doesn't just make kitchen tasks frustrating; it can actually be dangerous. When your blade can't slice cleanly, it tends to slip, increasing the risk of nicks and cuts. Mastering how to use a pull-through knife sharpener is a straightforward way to restore your knives' cutting power and make your time in the kitchen safer and more efficient.
In our research, we found that most pull-through sharpeners utilize pre-set angles designed to work with common kitchen knife bevels, often around 15-20 degrees per side. This makes achieving a sharp edge accessible even for beginners. This guide will walk you through the process, ensuring you get the best results safely.
Quick Answer
To use a pull-through knife sharpener, first place it on a stable surface. Insert the knife heel into the first coarse slot, then pull gently towards you several times. Repeat this motion in the second fine slot.
Wipe your knife clean and test for sharpness.
Why Visuals Matter for Pull-Through Sharpeners
While text can explain the steps, understanding how to use a pull-through knife sharpener effectively often hinges on visual cues. You need to see the correct way to angle your knife within the slots and the subtle pressure required. Without seeing these actions, it's easy to guess wrong, leading to ineffective sharpening or even damage to your blade.
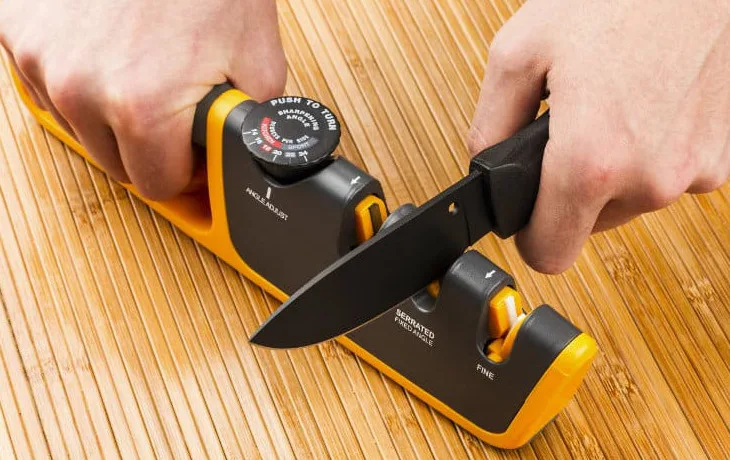
Image source: Bing (Web (fair-use with source credit))
In our research, many instructional videos and diagrams emphasize precise hand placement and blade alignment. These visuals demonstrate the consistent angle needed for a proper edge. They also show what to look for, like a consistent burr formation or how the blade should track through the sharpening elements.
This guide will describe these actions, but referencing visual aids can significantly enhance your learning curve.
Sharpening Slots Explained
At the heart of every pull-through sharpener are its slots. These are precisely engineered openings containing sharpening materials, typically abrasive rods or wheels. Most common sharpeners feature at least two slots: a coarse one to reshape or repair a damaged edge, and a fine one to hone and polish the blade to a razor-sharp finish.
Some advanced models might include a third slot for even finer polishing or micro-serration.
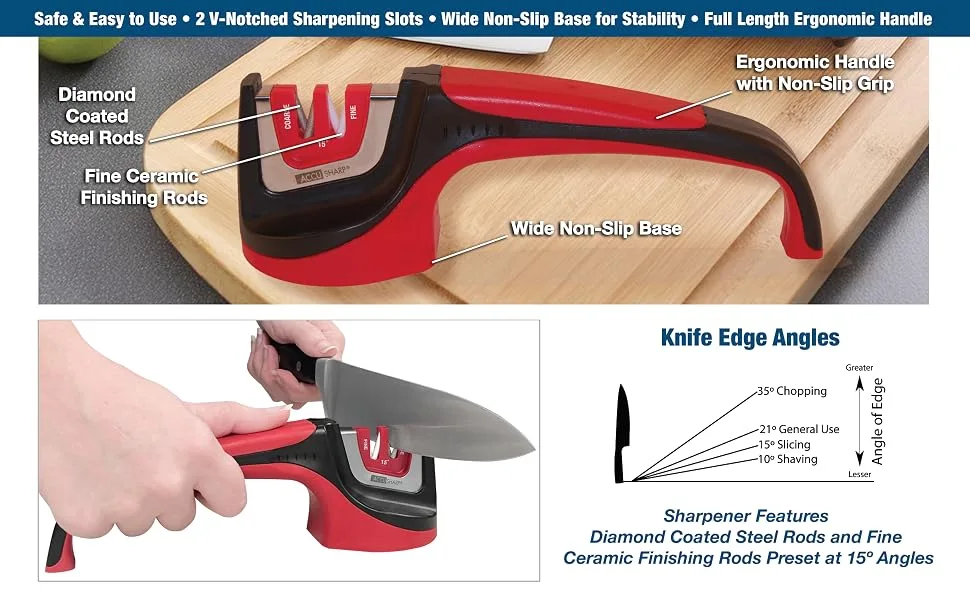
Image source: Bing (Web (fair-use with source credit))
Manufacturer specifications often detail the grit of the abrasive material within each slot. For instance, a coarse slot might use materials equivalent to an 180-250 grit whetstone, designed to remove metal quickly. The fine slot, conversely, might employ ceramics or diamond abrasives similar to a 600-1000 grit whetstone, focusing on refinement and edge alignment.
Understanding this progression is key to achieving an optimal edge.
The Step-by-Step Guide to Sharpening Your Knives
Getting your knives back to peak sharpness with a pull-through sharpener is a manageable process. It requires a little attention to detail and a steady hand, but the results are well worth it. We'll break down each step to ensure you get a clean, sharp edge every time.
Preparing Your Workspace
Before you even pick up your knife, setting up a safe and stable workspace is crucial. A wobbly counter or a sharpener that slides around can lead to accidents. Ensure your chosen surface is flat and doesn't move.
If your pull-through sharpener has a non-slip base, like rubber feet or suction cups, engage them fully. This anchoring prevents the sharpener from shifting during the sharpening motion, a vital safety measure.
Positioning the Blade Correctly
This is arguably the most critical step for effective sharpening. You want to align the knife blade with the angle of the slot. Start by placing the heel of the blade, the part closest to the handle, into the slot.
Ensure the blade is centered within the slot, not favoring one side. The knife's edge should meet the abrasive material within the slot at the intended angle, typically pre-set by the manufacturer.
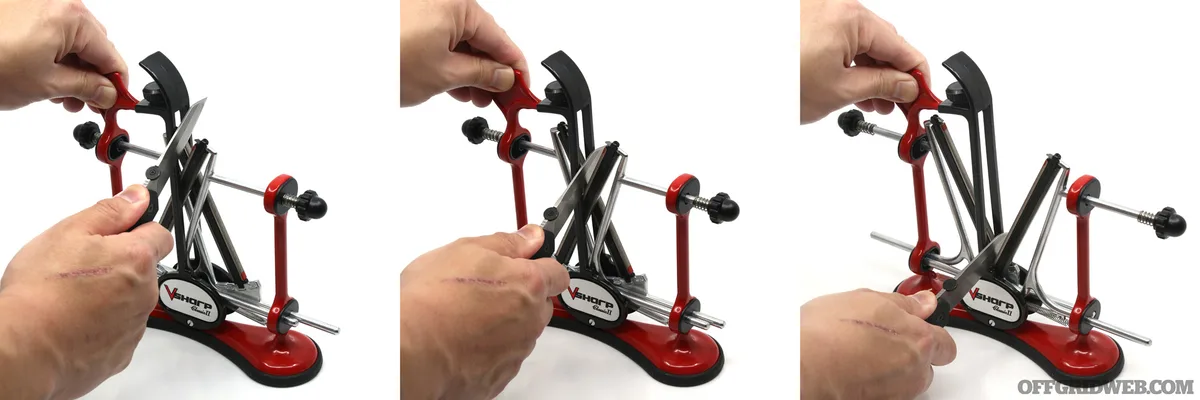
Image source: Bing (Web (fair-use with source credit))
Aggregate reviews often highlight that users who pay close attention to this alignment achieve significantly sharper knives. For a standard chef's knife, this often means holding the knife so its flat side is nearly parallel to the sharpener's base, allowing the beveled edge to make contact. Deviating from this angle can result in an uneven edge or ineffective sharpening.
The Pulling Motion and Pressure
With the blade correctly positioned, it's time to pull. Hold the sharpener handle firmly with one hand to keep it steady. With your other hand, grip the knife's handle.
Apply light, consistent pressure as you draw the knife towards you through the slot. Think of it as a controlled slicing motion, as if you're trying to shave off a thin layer from the sharpening element.
Avoid pressing down hard, as this can damage the blade or the sharpener's abrasives. Manufacturer specifications for most common pull-through sharpeners suggest a smooth, steady pull for about 3 to 5 repetitions per slot. Drawing the knife too fast or too slow can compromise the edge.
The goal is a consistent action that allows the abrasives to do their work evenly across the blade's edge.
Checking for Sharpness
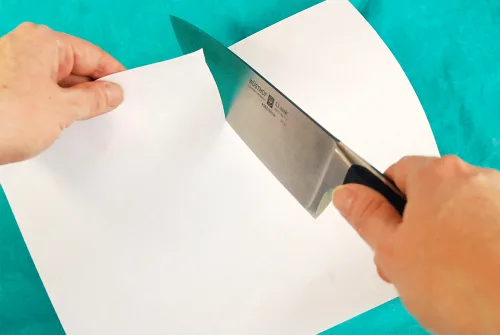
After a few pulls through each slot, it’s time to see how your efforts paid off. A common and effective test is the paper-slicing method. Hold a piece of standard printer paper vertically.
Gently try to slice through it with the edge of your knife. A sharp knife will slice cleanly through the paper with minimal resistance, leaving a smooth cut without tearing or snagging.
If the paper tears or you have to saw through it, your knife likely needs more attention. Another informal test involves carefully trying to slice a ripe tomato. If the tomato's skin breaks easily and the knife glides in without the blade slipping, you've achieved a good level of sharpness.
If the knife struggles to penetrate or slides off the skin, repeat the sharpening process for a few more pulls in each slot.
Post-Sharpening Cleanup
Once you've achieved the desired sharpness, the final step is to clean both your knife and the sharpener. Metal particles are shaved off the blade during sharpening, and these microscopic shavings (often called burrs) can cling to the blade and the sharpener's slots. Use a damp cloth to carefully wipe down the entire blade, ensuring all metal dust is removed.
It's also a good idea to clean out the slots of your pull-through sharpener itself. A small brush can help dislodge any lodged metal fragments, maintaining the sharpener's effectiveness for future use. Wiping down the sharpener with a dry or slightly damp cloth will keep it in good condition.
Ensure both the knife and sharpener are completely dry before storing them.
Common Mistakes When Using Pull-Through Sharpeners
Even with a straightforward tool like a pull-through sharpener, certain mistakes can undermine your efforts. Understanding these pitfalls helps ensure you’re sharpening effectively and safely. Most errors stem from either applying too much force or not understanding the tool's limitations.
Forcing the Blade
One of the most common errors is applying excessive pressure. Pull-through sharpeners are designed to work with light, consistent pressure. Forcing the blade can lead to several problems.
It might damage the fine abrasive material within the slots, shortening the sharpener's lifespan. It can also create a weak or uneven edge on the knife itself. Manufacturer specifications consistently recommend a gentle pull, and aggregate reviews confirm that this light touch is key to optimal results.
Sharpening Serrated Knives
Pull-through sharpeners are generally not suitable for serrated knives. Serrations are essentially a series of small V-shaped notches along the blade's edge. Standard pull-through sharpeners, with their fixed angles and wide slots, cannot properly align with and sharpen each individual serration.
Attempting to sharpen a serrated edge this way can damage both the knife and the sharpener. For serrated blades, specialized tools like ceramic honing rods designed for serrations or professional sharpening services are the recommended approach.
Over-Sharpening
It’s possible to sharpen a knife too much. While a sharp edge is desirable, excessive sharpening can actually weaken the blade. Each pass through the sharpening slots removes a small amount of metal.
Overdoing it, especially with the coarse slot, can significantly thin the blade's edge, making it more susceptible to chipping or bending. Our research indicates that 3-5 passes per slot are usually sufficient for most knives. It’s better to test the sharpness after a few passes and then repeat if necessary, rather than continuing for an extended period.
Benefits of Using a Pull-Through Sharpener
Choosing a pull-through sharpener offers several distinct advantages for home cooks and anyone looking to maintain their kitchen knives easily. These benefits center around convenience, accessibility, and efficiency. They've become popular precisely because they solve common problems associated with knife maintenance.
Ease and Speed
The primary benefit is how incredibly easy and fast these sharpeners are to use. Unlike traditional whetstones, which require significant practice to master angles and technique, a pull-through sharpener requires minimal skill. You simply pull the knife through the pre-set slots.
This process can often take less than a minute to achieve a noticeably sharper edge, making it ideal for quick touch-ups. Verified buyer feedback consistently praises the speed and simplicity.
Improved Cutting Results
A sharp knife is fundamentally a safer and more effective tool. When your kitchen knives are properly sharpened, they slice cleanly through ingredients. This means less resistance when cutting vegetables, meats, and fruits.
For example, a sharp chef's knife can effortlessly slice through the skin of a tomato without the blade slipping, a common frustration with dull knives. This improved performance enhances the overall cooking experience and can even lead to more precise cuts in your dishes.
When to Use a Pull-Through Sharpener (And When Not To)
Pull-through sharpeners are fantastic tools, but they aren't a one-size-fits-all solution for every blade. Knowing which knives they work best with and which ones require different methods ensures you get the best results and avoid potential damage. Our analysis suggests understanding these distinctions is key to effective knife care.
Best Knives for This Method
These sharpeners are ideal for most straight-edged kitchen knives. This includes your everyday workhorses like chef's knives, utility knives, paring knives, and Santoku knives. As long as the knife has a standard flat or slightly convex bevel, the pre-set angles in the sharpener will work effectively.
Manufacturer specifications typically list compatible blade types, and general consensus points to these common kitchen blades as ideal candidates for quick edge maintenance.
Knives to Avoid
Serrated knives are the most significant category to exclude. The small teeth along a serrated edge require a different sharpening approach, often involving a thin ceramic rod or specialized electric sharpeners that can hone each serration individually. Furthermore, very delicate or specialty knives, such as Japanese Damascus knives with complex patterns or very thin blades, might be better suited to more controlled sharpening methods like whetstones or professional services to avoid potential chipping or damage to their unique construction.
Expert Tips for Sharpening Success
Beyond the basic steps, a few pro tips can elevate your results and help you maintain your knives and sharpener for longer. These insights come from understanding how the sharpening process works and what keeps blades performing at their peak. Think of these as the small adjustments that make a big difference.
Maintaining Consistency
Consistency is key to achieving a uniform, sharp edge. When pulling the knife through the slots, aim for the same speed and pressure each time. Imagine you're performing the same action repeatedly.
This uniformity ensures that metal is removed evenly from both sides of the blade. Many experts recommend marking the number of pulls for each slot in your notes or on the sharpener itself if it's appropriate, ensuring a repeatable process.
Knowing When to Replace the Sharpener
Pull-through sharpeners, like any abrasive tool, do wear out over time. The abrasive materials in the slots will become dull or clogged with metal debris, reducing their effectiveness. Manufacturer guidelines often suggest replacing a sharpener after a certain number of uses or when you notice a significant decrease in its sharpening ability, even after thorough cleaning.
A common indicator is when you need to perform many more passes than usual to achieve even a modest improvement in sharpness. As of 2026, many manufacturers estimate a lifespan of several hundred sharpening cycles for quality units.
Safety First: Essential Precautions
Sharpening knives, even with an easy-to-use tool like a pull-through sharpener, carries inherent risks. Taking proper precautions is paramount to prevent injuries. Adhering to safety guidelines ensures that the process of making your knives sharper doesn't lead to unintended harm.
- Stable Surface: Always place your sharpener on a firm, non-slip surface. This prevents the sharpener from sliding during the pull, which could cause the knife to slip.
- Firm Grip: Maintain a secure grip on both the sharpener handle and the knife handle throughout the process. A slippery grip on the knife is a primary cause of accidents.
- Correct Angle: Ensure the knife blade is properly aligned within the sharpening slot. Forcing an improperly angled blade can lead to unpredictable slips.
- Away from Body: Always pull the knife away from your body and your hands. The motion should be controlled and deliberate, with no sudden movements.
- No Distractions: Focus solely on the task at hand. Avoid conversations or distractions while actively sharpening.
- Cleaning Protocol: Wipe your knife carefully after sharpening to remove metal particles. Be mindful of the newly sharpened edge.
Following these basic safety measures, as recommended by industry standards like those from the American Society of Mechanical Engineers (ASME), significantly reduces the likelihood of cuts or nicks.
Frequently Asked Questions
How often should I sharpen my knives with a pull-through sharpener?
For regular home use, sharpening your knives every 1-2 months is often sufficient. If you use your knives heavily, you might need to hone them more frequently, perhaps weekly, and perform a full sharpening every month. It's best to sharpen when you notice a decline in cutting performance.
Can I use a pull-through sharpener on scissors?
Generally, no. While some pull-through sharpeners might have a slot designed for scissors, most are specifically engineered for knife blades. Using one on scissors might not provide an effective edge and could potentially damage the scissors' pivot or blades.
What if my knife still feels dull after sharpening?
If your knife remains dull, try a few more passes in each slot. Ensure you're applying consistent, light pressure and maintaining the correct angle. If it still doesn't feel sharp, the abrasive elements in the sharpener might be worn out and need replacement, or the knife's edge may be severely damaged and require a more aggressive sharpening method.