Can You Sharpen a Serrated Knife?
You’ve probably found yourself staring at a dull serrated knife, wondering if that saw-like edge can ever be brought back to life. It’s a common kitchen dilemma: these knives, perfect for slicing through crusty bread or juicy tomatoes, can become frustratingly ineffective when their sharp points dull down.
The good news is that yes, you can sharpen a serrated knife. It’s not quite the same as sharpening a straight-edged blade, but with the right tools and a bit of know-how, you can restore that cutting power. Manufacturer specifications for many high-quality serrated knives suggest regular edge maintenance can prolong their useful life considerably.
Quick Answer
Yes, you can sharpen a serrated knife. The process focuses on restoring the edge of each individual tooth. You need specific tools, like a thin sharpening rod, to hone each serration.
Attempting to sharpen them like a straight blade will damage the edge.
Why Sharpening Serrated Knives Is Different
Serrated knives aren't just straight knives with extra bits welded on. Their unique design means a different approach to sharpening is needed. A straight-edged knife has a continuous bevel that runs along the entire length of the blade.
When you sharpen it, you're creating a fresh, uniform edge on that bevel.
A serrated knife, however, functions more like a saw. It has a series of small, sharp teeth, each with its own tiny bevel. Between these teeth are spaces called gullets.
When you use a serrated knife, it's the points of these teeth that do the cutting, using a sawing motion that slices through materials with less pressure than a straight blade. Sharpening them means addressing each of these individual tooth points.
How Serrated Knives Work: Teeth and Gullets Explained
The cutting power of a serrated knife comes from its teeth. Each tooth acts as a miniature blade, with its own sharp point and angled bevel. These teeth are designed to bite into the surface of whatever you're cutting, whether it's the tough crust of a baguette or the slippery skin of a tomato.
The gullets, or the spaces between the teeth, help to reduce friction and prevent the blade from getting stuck.
When you cut with a serrated knife, the initial contact is made by the very tips of the teeth. As you draw the knife through the item, these points pierce and then slice, similar to how a saw works through wood. This sawing action is what allows serrated knives to cut through soft interiors and tough exteriors without crushing them.
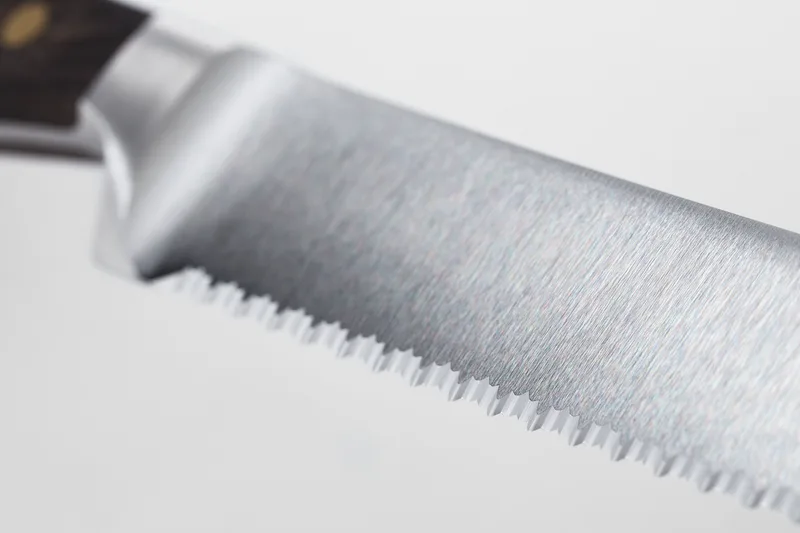
Image source: Bing (Web (fair-use with source credit))
Sharpening Tools: What You Need for Serrated Blades
Because of their unique toothy design, you can't use just any sharpening tool on a serrated knife. Generic sharpeners designed for straight blades simply won't work and can actually damage the edge. You need tools that can precisely address each individual tooth.
Sharpening Rods: Your Best Bet
For most home cooks, a fine-grit sharpening rod is the go-to tool for serrated knives. These rods come in various materials, including ceramic and diamond-impregnated steel. The key feature is their slender profile, which is crucial for fitting into the gullets between the teeth.
You'll want a rod that’s roughly the diameter of the gullets on your knife. This allows you to angle the rod against the bevel of each individual tooth. It's a more manual process than using a pull-through sharpener, but it offers superior control and is less likely to remove too much metal or create an uneven edge.
Aggressive sharpening can remove too much steel, shortening the knife's lifespan.
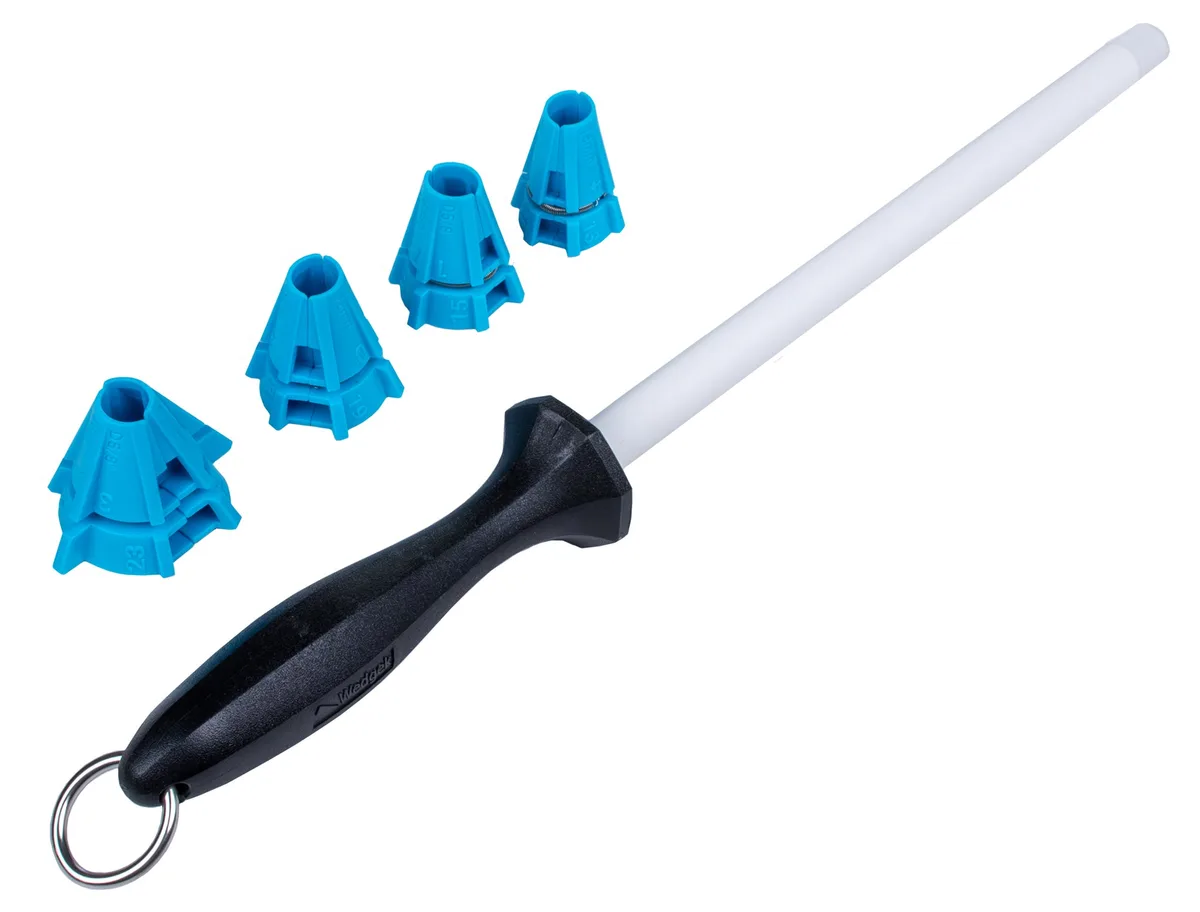
Image source: Bing (Web (fair-use with source credit))
Specialized Sharpeners: Are They Worth It?
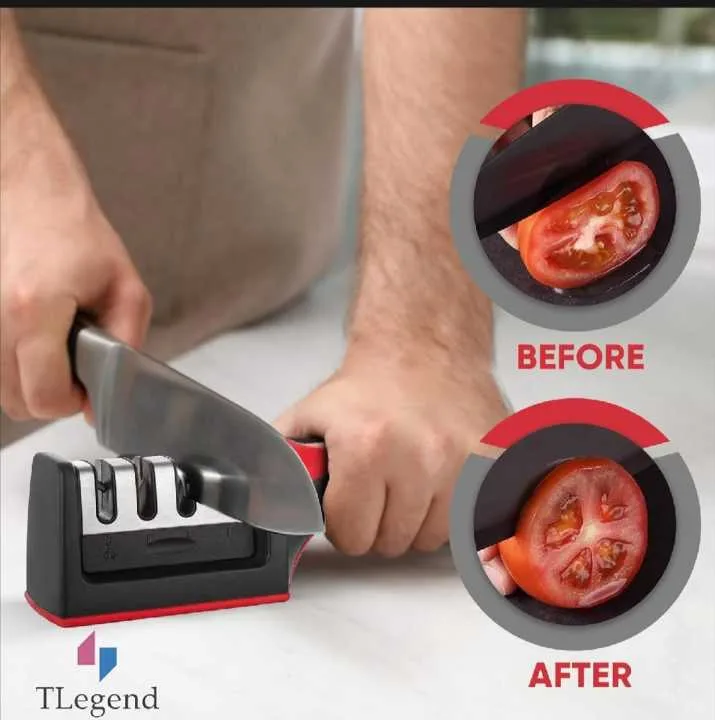
You'll also find pull-through sharpeners specifically marketed for serrated knives. These often have V-shaped slots with carbide or ceramic inserts designed to catch the teeth as you pull the blade through. They can be quicker than using a rod, especially if you're in a hurry.
However, our research indicates these can sometimes be a bit too aggressive. If you apply too much pressure or pull the knife through too many times, you risk grinding down the teeth unevenly or removing excessive metal. Always follow the manufacturer's instructions precisely and use light, consistent pressure.
For critical knives, manual rod sharpening offers more control.
Whetstones: The Advanced Method
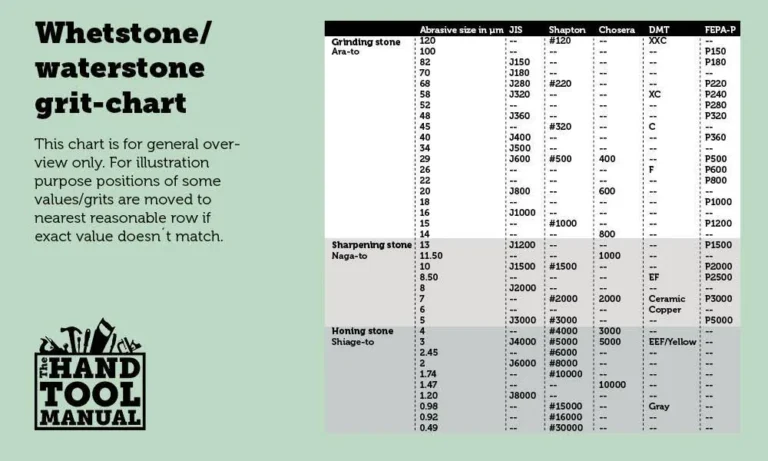
While rods are generally recommended, it is technically possible to sharpen serrated knives using whetstones. This method demands a higher level of skill and patience. You would typically use a fine-grit whetstone and try to align it with the bevel of each tooth individually.
This requires a very steady hand and a keen eye to ensure you're hitting the correct angle for every single tooth. Because of the difficulty in maintaining consistent contact with each tiny bevel, many users find whetstones to be less effective and more time-consuming for serrated blades compared to sharpening rods. It's a method best reserved for those with extensive knife-sharpening experience.
Step-by-Step: How to Sharpen Your Serrated Knife
Sharpening a serrated knife isn't complicated, but it requires a methodical approach. The goal is to restore the keenness to each tooth’s edge without damaging the surrounding metal or the gullets. Here's how to do it effectively using a sharpening rod.
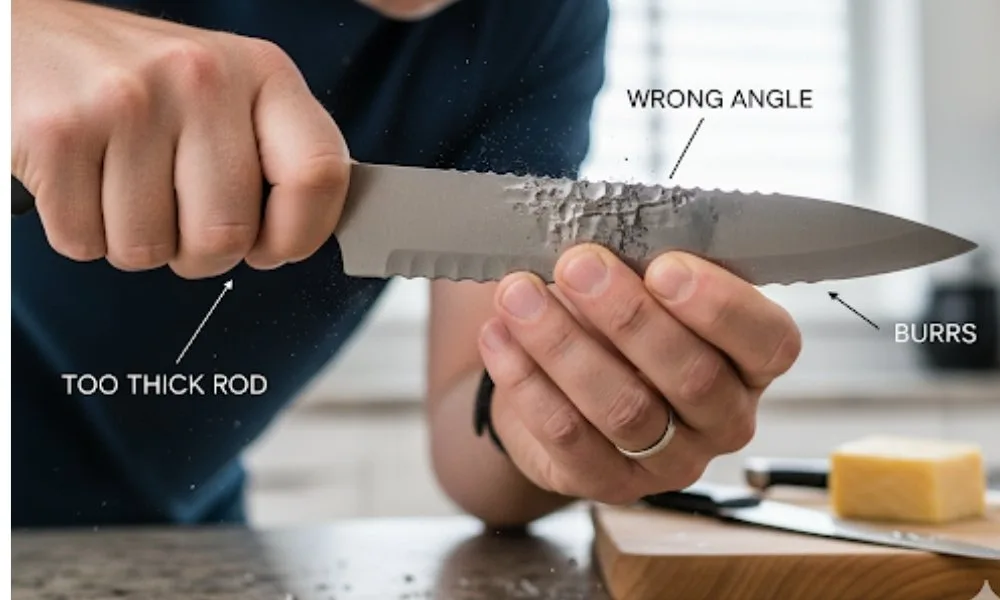
Image source: Bing (Web (fair-use with source credit))
Prep Work: Getting Ready
Before you start, gather your materials. You'll need your serrated knife and a fine-grit sharpening rod that fits comfortably into the gullets. A stable surface, like a cutting board, is essential to keep the knife from moving.
Some people also like to have a damp cloth or paper towel handy to wipe away any metal filings that appear during the sharpening process. Ensure your work area is well-lit so you can clearly see each tooth as you work.
Sharpening Each Tooth: The Technique
- Secure the Knife: Place the knife on your stable surface. You can either hold the handle firmly in your non-dominant hand, keeping your fingers away from the blade, or secure the blade itself if it's large enough.
- Find the Angle: Examine the teeth of your knife. You'll notice a bevel along the edge of each tooth. You need to match this angle with your sharpening rod. For most kitchen knives, this angle is typically around 15 to 20 degrees per side.
- Sharpen One Side: Insert the tip of the sharpening rod into the first gullet. Align the rod so it matches the bevel angle of the tooth.
- The Stroke: Apply light, consistent pressure and draw the rod forward and slightly down, following the angle of the tooth's edge. Imagine you are "sawing" the rod along the edge of that single tooth. You're not trying to sharpen the entire length at once.
- Move to the Next Tooth: Lift the rod and move to the next gullet. Repeat the stroking motion on the next tooth. Continue this process, working your way down the entire length of the blade on one side.
- Switch Sides: Once you've sharpened all the teeth on one side of the blade, flip the knife over. Repeat steps 3 through 5 to sharpen the teeth on the other side. It's important to apply roughly the same number of strokes to each side to maintain balance.
Testing and Finishing
After you've sharpened both sides, it's time to test the edge. Gently run your fingertip away from the blade's edge, being very careful not to cut yourself. You should feel a distinct sharpness on the newly honed teeth.
If it doesn't feel sharp enough, repeat the sharpening process for a few more strokes on each tooth.
Finally, wipe the entire blade clean with a damp cloth or paper towel to remove any fine metal particles that may have been created during sharpening. Store your knife properly in a knife block or sheath to protect the newly sharpened edge.
Common Mistakes When Sharpening Serrated Knives
Even with the right tools, it's easy to make mistakes when sharpening serrated knives. One of the most frequent errors is using a sharpening tool that’s too large for the gullets. If the rod or stone doesn't fit comfortably into the space between the teeth, you'll end up hitting the sides of the gullets instead of the edge of the tooth itself.
This can dull the teeth or even chip them.
Another common pitfall is using too much pressure. Serrated knives have relatively thin teeth, and excessive force can easily bend, break, or prematurely wear down these delicate points. It's always better to use light, consistent pressure and make more strokes rather than fewer, forceful ones.
Additionally, some people try to sharpen the entire blade as if it were straight, which completely misses the point of targeting individual teeth and will render the knife less effective.
When to Call a Professional Sharpener
While sharpening a serrated knife at home is definitely achievable, there are times when calling a professional makes more sense. If you have a very high-end or specialty serrated knife, like a Japanese bread knife or a premium chef's knife with serrations, you might worry about damaging it. A professional sharpener has specialized equipment and extensive experience with different blade types and steels.
They can often achieve a more precise and even edge than most home users, especially if your knife has very fine or uniquely shaped serrations. If your knife has significant damage, like chips or bent teeth, a professional is better equipped to repair that damage safely. For most everyday kitchen knives, home sharpening is fine, but for valuable blades or complex damage, a pro is your safest bet.
The Sharpening Angle: Precision Matters
Getting the sharpening angle right is critical for effective serrated knife sharpening. While the exact angle can vary slightly depending on the knife manufacturer and design, a general range is commonly cited. For most kitchen serrated knives, manufacturer specifications and industry standards suggest an angle between 15 and 20 degrees per side.
This angle creates a fine, sharp bevel on each tooth that can efficiently slice through materials. If the angle is too steep (higher than 20 degrees), the edge may be too coarse and prone to chipping. If the angle is too shallow (lower than 15 degrees), the edge might be too fragile and wear down very quickly.
The key is consistency: you need to maintain that chosen angle as you work each tooth.
How to Find the Correct Angle
- Observe the Tooth: Look closely at an unsharpened tooth. You should be able to see the existing bevel. Try to match the angle of your sharpening rod to that bevel.
- Visual Aids: Some sharpening rods come with angle guides or indicators. If yours doesn't, you can use a protractor or even a simple method of holding the rod against the tooth.
- Consistency is Key: The most important factor is not necessarily hitting an exact number, but maintaining the same angle for every single tooth on both sides of the blade. Practice will help you develop a feel for the correct angle.
Maintaining Your Serrated Knife's Edge
Sharpening is only part of the equation for keeping your serrated knife cutting well. Proper maintenance between sharpenings is just as important. Regular honing can help keep the teeth aligned and extend the time between full sharpening sessions.
Honing involves using a steel rod to gently realign the microscopic burrs on the edge of the teeth that can get bent out of shape during normal use. It doesn't remove metal, but rather straightens the existing edge. For serrated knives, you would use a thin honing rod, similar to a sharpening rod, and carefully run it along the edge of each tooth, maintaining the appropriate angle.
- Frequency: Hone your serrated knives weekly or whenever you notice a slight decrease in cutting performance.
- Technique: Use light pressure and focus on realigning the existing edge. Avoid grinding or scrubbing.
- Cleaning: Always wash and dry your knives by hand after use. Dishwashers can dull blades and damage handles.
Frequently Asked Questions
How often should I sharpen my serrated knife?
You should sharpen your serrated knife when it no longer cuts effectively. This could be every few months for heavy users, or perhaps once or twice a year for less frequent use, depending on the quality of the steel and how often it's used. Regular honing can extend the time between sharpenings.
Can I use a regular sharpening stone on a serrated knife?
It's difficult to effectively sharpen a serrated knife with a standard flat sharpening stone. The flat surface doesn't allow you to target the individual teeth and their specific bevels. A specialized tapered sharpening stone or a sharpening rod designed for serrations is much more effective and less likely to cause damage.
What happens if I sharpen my serrated knife incorrectly?
Sharpening incorrectly can lead to several problems. You might end up with an uneven edge where some teeth are sharper than others, or you could damage the teeth by removing too much metal, thinning them excessively, or even chipping them. This will result in reduced cutting performance and a shorter lifespan for your knife.
Are bread knives always serrated?
Most bread knives are serrated because the saw-like edge is ideal for slicing through crusty bread without crushing the soft interior. However, some artisan or specialty bread knives might have a very fine, straight edge, but the vast majority you encounter will be serrated.