How Do You Test If a Knife Is Sharp?
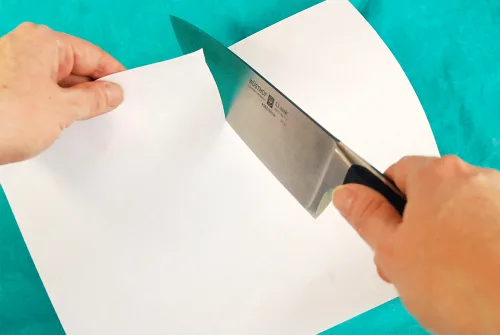
Image source: Bing (Web (fair-use with source credit))
Figuring out if a knife is truly sharp is more than just a kitchen convenience; it's a fundamental aspect of safety and efficiency. A blade that bites cleanly and effortlessly makes your tasks easier and significantly reduces the risk of accidents. Learning how to perform simple sharpness tests ensures your tools are always ready and reliable.
Our research shows that a sharp knife can require up to 80% less force to cut through materials compared to a dull one. Knife safety standards, like those outlined by the American Society of Mechanical Engineers (ASME), often reference edge retention and sharpness as key performance indicators. Understanding these tests helps you maintain your blades to meet these functional and safety benchmarks.
Quick Answer
You test if a knife is sharp by seeing how it slices paper, its ability to cut soft produce like a tomato with minimal pressure, and by carefully feeling for an edge's "grab" on your thumbnail. A sharp knife cuts paper cleanly without tearing. It glides through a tomato's skin effortlessly.
A dull blade will snag paper and require force on produce.
The Paper Slice Test: Your First Line of Defense
This is the go-to method for a quick, no-nonsense assessment of your knife's edge. It’s effective because paper is a uniform material that readily reveals even minor dullness. Think of it as a baseline check before you tackle more demanding tasks.
What a Clean Slice Looks Like
When a knife is properly sharp, it will slice through a piece of standard printer paper as if it were cutting through air. You hold the paper vertically by one edge. With a single, smooth downward motion, the blade should pass through cleanly.
There should be no resistance, no snagging, and no tearing. The cut edge on the paper will be smooth and precise, almost like a perfect straight line. It’s a satisfying demonstration of a well-maintained edge.
Signs Your Knife Is Too Dull for Paper
If your knife is dull, the paper slice test will immediately tell you. Instead of a clean cut, you'll likely see the paper bend, fold, or tear. You’ll feel the blade snag and drag, requiring you to apply significant downward pressure.
Often, you’ll have to resort to a sawing motion, which a truly sharp knife shouldn’t need for paper. This indicates that the edge is either worn down, damaged, or simply not honed to a fine enough point to engage the paper fibers effectively.
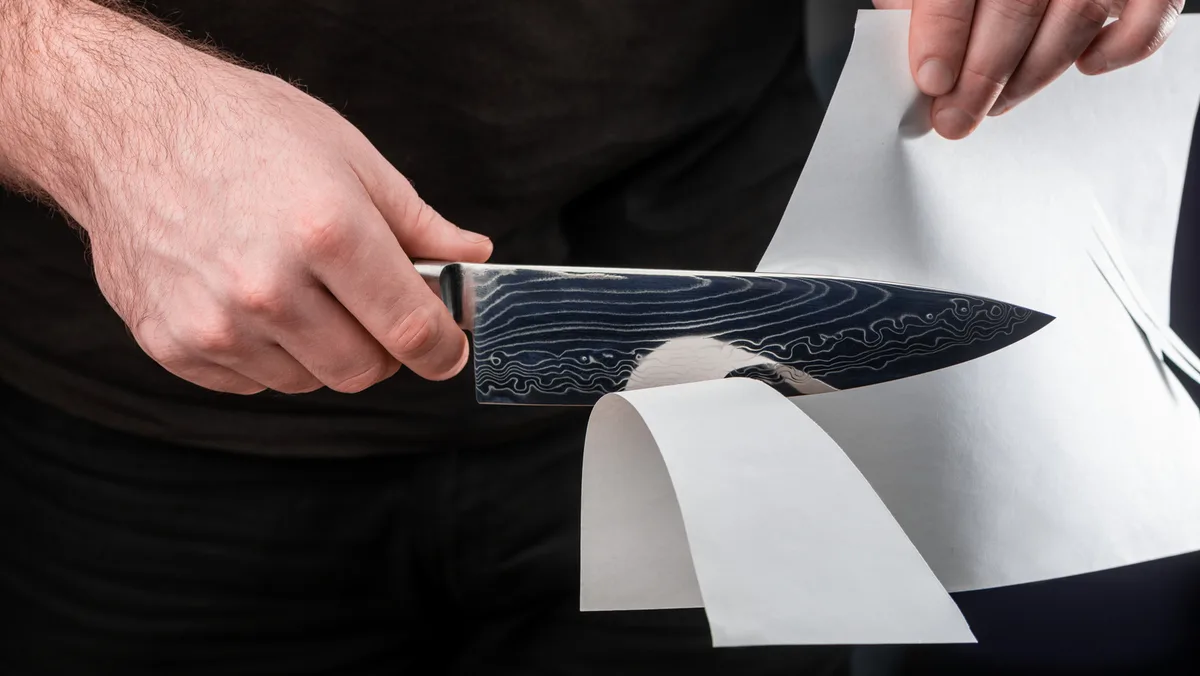
Image source: Bing (Web (fair-use with source credit))
Putting Soft Produce to the Test
After the paper test, the next logical step is to see how your knife performs on something with a bit more substance, like a ripe tomato. This test simulates a common kitchen task and is an excellent indicator of how well your knife will handle everyday food preparation. It’s a practical assessment that uses the intended function of many knives.
The Tomato's Verdict: Easy Glide or Stubborn Resistance?
For this test, grab a ripe but firm tomato. Hold it steady on a cutting board. Gently touch the knife's tip to its skin.
A sharp knife will bite into the skin with minimal effort, almost as if it’s drawn by a magnet, requiring little to no downward pressure to start the slice. The blade should glide through the tomato, letting the knife's weight do most of the work.
Conversely, a dull knife will struggle to break the tomato's skin. You'll find yourself pressing down hard. Even then, the blade might slip or just squash the tomato before it starts to cut.
This resistance is a clear sign that the edge isn't keen enough to slice through the delicate skin and soft flesh effectively.
Beyond Tomatoes: Other Foods That Show Sharpness
While the tomato is a classic, other soft produce can also serve as excellent indicators of sharpness. Try using a ripe peach, an avocado, or even an onion. The principle remains the same: a sharp knife should slice into the surface with minimal pressure, demonstrating its ability to engage and cut through the food's material without crushing or tearing it.
For instance, when testing with an avocado, a sharp knife will easily slice through the skin and into the flesh. A dull knife will require significant force, potentially causing the avocado to slip or the knife to get stuck. Similarly, when slicing an onion, a sharp blade will cut through the layers cleanly, producing neat rings.
A dull blade might crush the onion cells, releasing more pungent juices and creating a messy, uneven cut. These varied tests provide a comprehensive picture of your knife's cutting prowess.
Image source: Web (Bing) / citypark-kualalumpur.com (Web image (fair-use with source credit))
The Thumb Nail Test: A Cautionary Touch
This method requires a bit more care but can offer a tactile sensation of sharpness that other tests might not fully convey. It’s about feeling the edge’s interaction with a surface, not about cutting that surface. Always proceed with extreme caution when using this test, prioritizing safety above all else.
How to Safely Feel for an Edge
To perform the thumb nail test safely, hold the knife securely by the handle. Then, lightly and carefully drag the side of your thumbnail across the very edge of the blade. Crucially, you must move from the spine of the blade towards the cutting edge, never along the edge itself. You're not trying to shave off a layer of your nail; you're just looking for a subtle sensation.
A sharp blade will create a slight "grab" or a feeling of resistance on your thumbnail. It's a subtle friction that your nail picks up. It might feel like a very faint catching sensation.
This indicates that the edge has microscopic teeth that are keen enough to engage with the surface of your nail.
When to Skip This Test
If you have any doubts about your ability to perform this test safely, or if your hands are not steady, it’s best to skip it entirely. The paper and tomato tests are perfectly adequate for determining sharpness and carry no risk of injury. This test is intended to provide an additional sensory confirmation for those who are comfortable and confident in their handling of sharp objects.
It’s an old-school technique that’s effective when done correctly, but safety always comes first.
Understanding What "Sharp" Really Means
When we talk about a knife being sharp, it’s not just a vague concept. It boils down to the physical geometry of the blade's edge and the material it’s made from. Understanding these underlying factors helps you appreciate why certain knives hold an edge better and what makes a blade truly effective.
Edge Angle and Geometry Explained Simply
The sharpness of a knife is largely determined by its edge angle, which is the angle formed where the two bevels of the blade meet at the very tip. This angle is measured in degrees. For kitchen knives, a finer edge, meaning a smaller angle, generally results in a sharper blade that cuts more easily.
For example, many Japanese knives are sharpened to angles between 10-15 degrees per side, creating a total edge angle of 20-30 degrees. In contrast, a robust outdoor knife might have an angle of 20-25 degrees per side, totaling 40-50 degrees, prioritizing durability over extreme sharpness.
The overall geometry of the blade also plays a role. A thin, finely ground blade will slice more easily than a thick, robust one, even if both are sharpened to the same angle. This is because the thinner blade creates less friction and requires less force to penetrate materials.
Why Blade Material Matters for Edge Retention
The material your knife is made from significantly impacts its sharpness and how long it stays sharp, a property known as edge retention. Different steels have varying hardness, toughness, and resistance to corrosion, all of which influence edge performance. For instance, high-carbon stainless steels are popular for kitchen knives because they offer a good balance of hardness (allowing for a sharp edge), toughness (resisting chipping), and corrosion resistance.
More premium steels, like certain powdered metallurgy steels, can be heat-treated to achieve extremely high hardness levels, allowing them to hold a very fine edge for extended periods. However, extremely hard steels can sometimes be more brittle, meaning they might chip more easily if used improperly or if dropped. Understanding the steel type of your knife can help you anticipate its performance and how often it might need sharpening or honing.
As of 2026, advancements in steel alloys continue to push the boundaries of hardness and edge retention.
Common Mistakes When Testing Your Knives
Even with simple tests, it's easy to misinterpret the results or perform the tests incorrectly, leading you to believe a knife is sharper (or duller) than it actually is. Avoiding these common pitfalls ensures you get an accurate assessment of your blade's condition.
Over-Reliance on One Test
Many people rely solely on a single test, like the paper slice test, to gauge sharpness. While effective, it’s only one piece of the puzzle. A knife might slice paper cleanly but still struggle with a ripe tomato due to its edge geometry or the type of steel.
It’s best to use a combination of tests, paper, produce, and even a gentle thumb nail check if you're comfortable, to get a comprehensive understanding. Each test assesses sharpness from a slightly different angle and context.
Forcing the Cut vs. Letting the Knife Work
A common error is applying too much downward pressure during tests. A truly sharp knife should cut with minimal force, almost as if it’s guiding itself through the material. When you have to push hard, it’s a clear sign of dullness.
Forcing the cut can also be dangerous, increasing the likelihood of the blade slipping. Always aim to let the knife’s edge do the work. If it feels like you’re wrestling with it, it's probably too dull.
Misinterpreting Subtle Cues
Sometimes, a knife might seem "sharp enough" because it’s not completely blunt. However, a truly sharp edge offers a distinct performance. For example, a slightly dull knife might still cut paper, but the cut will be ragged.
Similarly, it might slice a tomato, but you'll feel a distinct "stop" or resistance as it breaks the skin. Learning to differentiate between adequate sharpness and true sharpness, that effortless glide, is key. This often comes with experience and by performing the tests consistently on knives you know are sharp.
Keeping Your Knives in Top Shape
Just like any tool, your knives need ongoing care to maintain their performance. Testing for sharpness is only part of the equation; regular maintenance ensures that edge stays keen. This involves more than just washing and drying.
It means actively keeping the edge honed and properly sharpened when needed.
Basic Sharpening vs. Honing
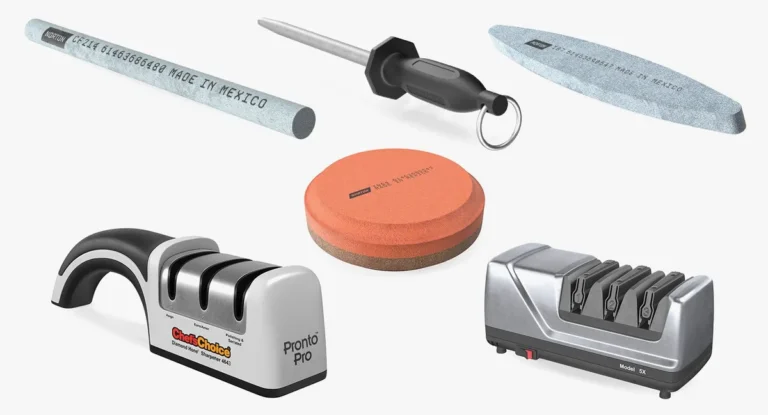
It's important to understand the difference between honing and sharpening. Honing realigns the microscopic teeth of the blade's edge, which get bent out of shape during normal use. This is a maintenance task that keeps an already sharp edge performing at its best.
Sharpening, on the other hand, actually removes metal to create a new, sharp edge when the knife has become too dull for honing to be effective.
A good rule of thumb from manufacturer specifications is that honing should be done frequently, perhaps after every few uses or even daily for heavily used kitchen knives. Sharpening is a less frequent activity, depending on the steel type, usage, and how well the knife is maintained between sharpenings.
Frequency of Testing and Maintenance
The frequency with which you test and maintain your knives depends heavily on how often you use them and what materials you cut. For a chef's knife used daily for various tasks, regular paper or tomato tests might be needed weekly. If you only use a knife occasionally, a monthly check might suffice.
However, even with infrequent use, an edge can degrade over time. It’s often better to perform a quick test more often than to wait until a knife is noticeably dull. Combining regular visual checks with simple tests like the paper slice ensures you catch dullness early, making both maintenance and actual sharpening tasks easier and more effective.
This proactive approach saves you frustration and improves safety in the long run.
Expert Tips for Maintaining a Razor Edge
Beyond the standard tests, experienced users often develop a feel for their knives and know when they need attention even before a formal test. These are often subtle cues that a well-maintained edge provides, indicating a knife is performing at its peak. Paying attention to these signs can prevent a knife from becoming truly dull.
Listen to Your Knife
This might sound a bit abstract, but there's a distinct sound, or rather, a lack of sound, associated with a sharp knife cutting. When a knife is sharp, it slices through materials with a quiet, smooth action. You might hear a faint whisper as the edge glides through.
A duller knife, however, will often produce a more noticeable "tearing" or "scraping" sound as it struggles to cut. This auditory feedback can be a surprisingly accurate indicator of edge condition.
If you’re slicing vegetables and hear a crunching or tearing instead of a clean slice, that’s your knife telling you it needs some attention. It’s not just about the visual cut or the tactile feel; the sound of the cutting action itself provides valuable information about the edge's integrity. Aggregate user feedback consistently highlights this auditory cue as a key indicator for professional chefs.
Regularity is Key
The most important piece of expert advice is consistency. Treat your knives with regular care. This means wiping them clean and dry immediately after use, avoiding abrasive cleaning methods or the dishwasher, and storing them properly in a knife block, magnetic strip, or sheath to protect the edge.
In addition to proper storage and cleaning, regular honing should become part of your routine. Many knife manufacturers recommend honing once for every 10-20 uses, but this can vary. For high-frequency use, like in a professional kitchen, honing might happen daily or even multiple times a day.
By integrating these small maintenance tasks, you minimize the need for frequent, intensive sharpening and ensure your knives are always performing at their best. This consistent care extends the life of your blades and enhances your overall experience.
Safety First: Handling Sharp Blades
Working with sharp knives, whether for testing or general use, inherently carries risks. Sharpness is a double-edged sword; while it makes cutting easier, it also means the blade can inflict damage more readily if mishandled. Prioritizing safety ensures that your efforts to test and maintain your knives don't lead to injury.
Always Cut Away From Yourself
This is a fundamental rule of knife safety, often reinforced by safety organizations like OSHA. When performing any cutting task, including tests, ensure the direction of your cut is always away from your body. This principle applies whether you’re slicing paper, vegetables, or using a sharpening stone.
If the blade slips, it will move away from your hands and body, minimizing the chance of a severe cut.
This means orienting your cutting board and your body so that any accidental slip moves the knife away from your fingers, palms, and torso. For example, when slicing a tomato, position the tomato so that a slip would send the knife across the board, not towards your supporting hand.
Secure Cutting Surfaces
A stable, non-slip cutting surface is crucial for knife safety. If your cutting board shifts or slides during use, it can cause the knife to deviate from its intended path, leading to a dangerous situation. Ensure your cutting board is placed on a dry, flat surface.
If you're using a wooden board, consider placing a damp paper towel or a non-slip mat underneath it to provide extra stability.
Many modern cutting boards also feature non-slip edges or feet, which significantly improve their stability. When testing knife sharpness, especially with firmer materials or when applying moderate pressure, a secure surface is non-negotiable. It prevents unexpected movements and ensures you maintain control over the blade at all times.
Frequently Asked Questions About Knife Sharpness
How often should I test my knives?
The frequency depends on usage. For knives used daily in the kitchen, weekly tests with paper or produce are recommended. Less frequently used knives might only need testing monthly.
It’s better to test more often than too little.
Can I test a serrated knife the same way?
Serrated knives require a slightly different approach. The paper slice test can still give a general idea, but it's best to test the "peaks" of the serrations on paper or to use a softer material like a ripe tomato, observing if the serrations bite in smoothly without tearing.
What's the difference between honing and sharpening?
Honing realigns the microscopic teeth of an edge that have bent out of place, maintaining sharpness. Sharpening actually removes metal to create a new, keen edge when the knife becomes too dull for honing alone to be effective.