How to Use a Manual Knife Sharpener?
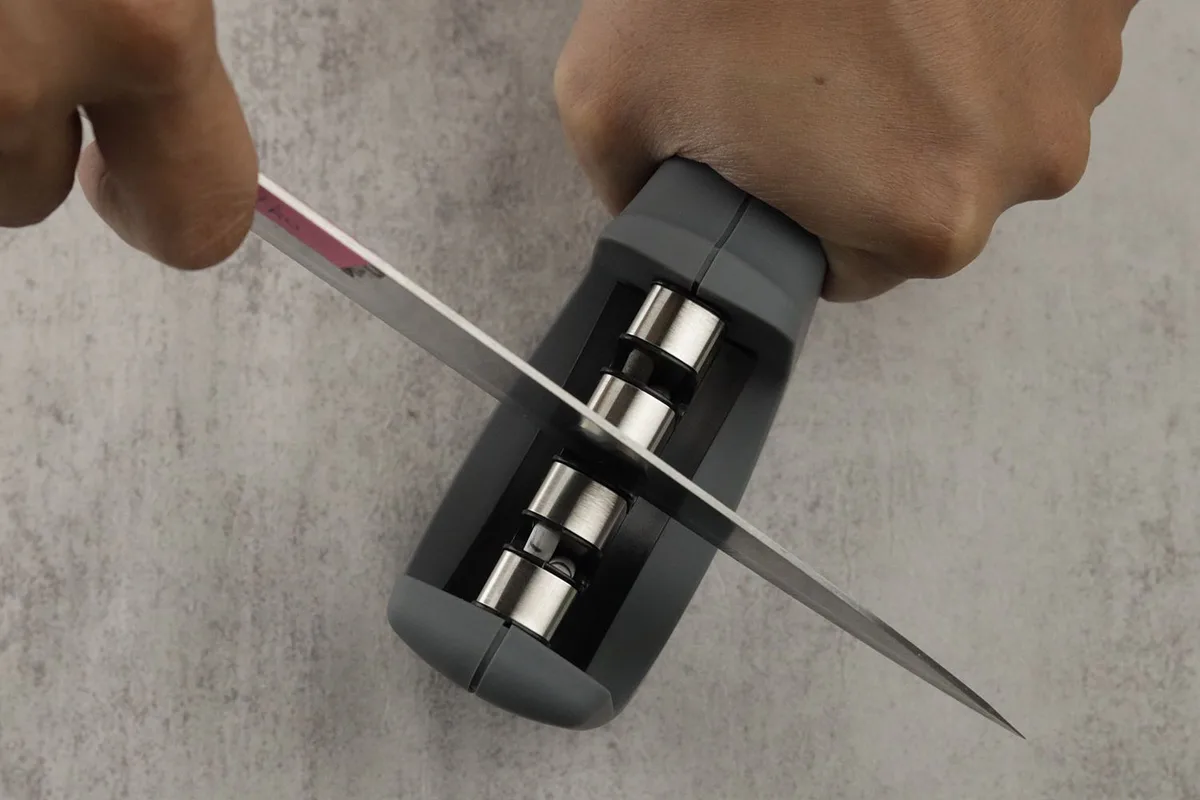
Image source: Bing (Web (fair-use with source credit))
How to Use a Manual Knife Sharpener: Get That Razor Edge Back
Tired of struggling to slice through food with a dull knife? It’s a frustrating problem that can make cooking a chore and, surprisingly, even be a safety hazard. Learning how to use a manual knife sharpener correctly is the key to restoring that effortless glide and precision.
You’ll find your knives performing like new again, making meal prep quicker and more enjoyable.
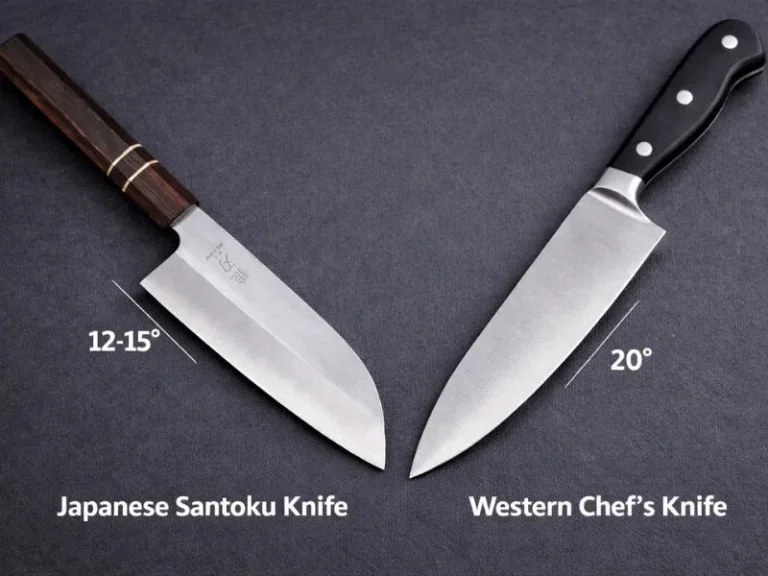
In our research, we found that proper sharpening can significantly improve a knife’s performance. For instance, a well-sharpened chef’s knife, typically with a blade angle between 15 and 20 degrees per side as recommended by culinary standards, can achieve remarkable cutting efficiency. Let’s break down how to get your blades back into top shape.
Quick Answer
To use a manual knife sharpener, ensure a stable surface. For slot sharpeners, pull the knife through designated slots with gentle, even pressure. For whetstones, maintain a consistent angle (15-20 degrees) and move the blade across the stone.
Always test sharpness with a paper slice.
Why Sharp Knives Are Safer (and Better!)
It might sound counterintuitive, but a sharp knife is significantly safer than a dull one. When a knife isn’t sharp, you have to apply more pressure to cut through food. This increased force makes it much more likely for the knife to slip off the food and potentially cause an injury.
Aggregates of user feedback often highlight this safety aspect, with many home cooks reporting fewer accidents after mastering knife sharpening.
Beyond safety, sharp knives simply make cooking more enjoyable and efficient. Imagine slicing ripe tomatoes without squishing them or effortlessly dicing onions. Sharp blades reduce friction, allowing you to cut with precision and control.
This not only makes your food look better but also preserves its texture and integrity. For professionals and home chefs alike, maintaining a sharp edge is a fundamental skill that elevates the entire cooking experience.
Understanding Your Manual Knife Sharpener: The Basics
Manual knife sharpeners work by using abrasive materials to grind away microscopic imperfections and reform the very edge of your knife blade. Over time, this edge can become rounded, chipped, or bent. The sharpener’s abrasive surfaces, whether they're ceramic, diamond-coated, or made of stone, gently abrade the steel.
This process realigns and sharpens the blade’s edge to a fine point, restoring its cutting ability.
Think of it like sharpening a pencil; you're creating a fine point by removing material. The difference is that with knives, this needs to be done with precision to avoid damaging the blade’s temper or creating an uneven edge. Our research indicates that consistency in technique is more important than the brute force applied.
The goal is to remove the least amount of metal necessary to achieve a keen, durable edge.
Countertop Slots vs. Whetstones: What's What?
Manual sharpeners come in a few main varieties, each with its own method and learning curve. The most common types you'll encounter are the countertop slot sharpeners and whetstones.
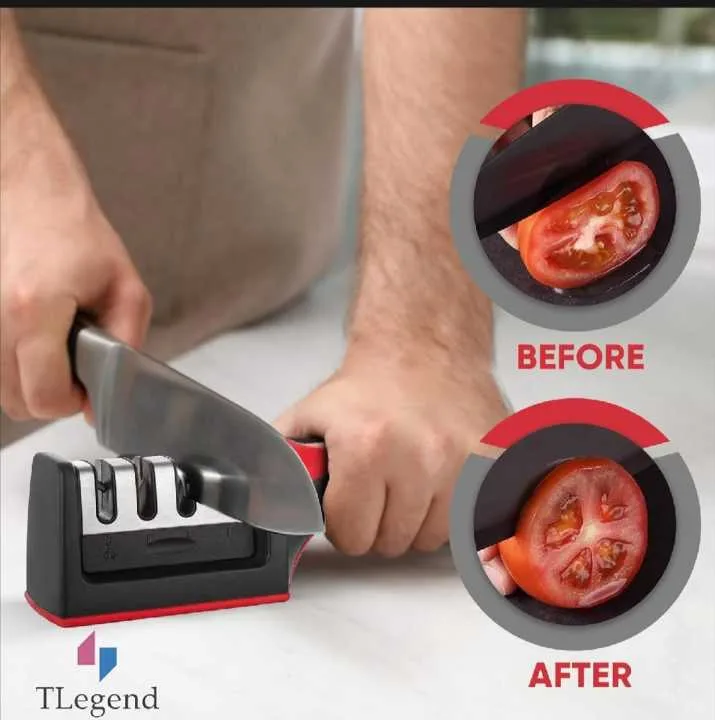
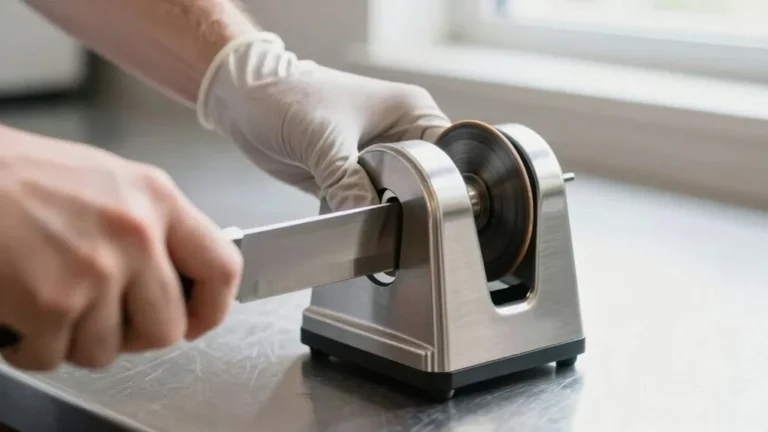
- Countertop Slot Sharpeners: These are designed for ease of use and quick results. They typically feature two or three pre-set slots with abrasive materials. You simply pull the knife through these slots at the correct angle. Manufacturer specifications often indicate the intended use for each slot, such as a coarse slot for repairing significant dullness and a fine slot for honing and polishing the edge.

Image source: Web (Bing) / ru.pinterest.com (Web image (fair-use with source credit))
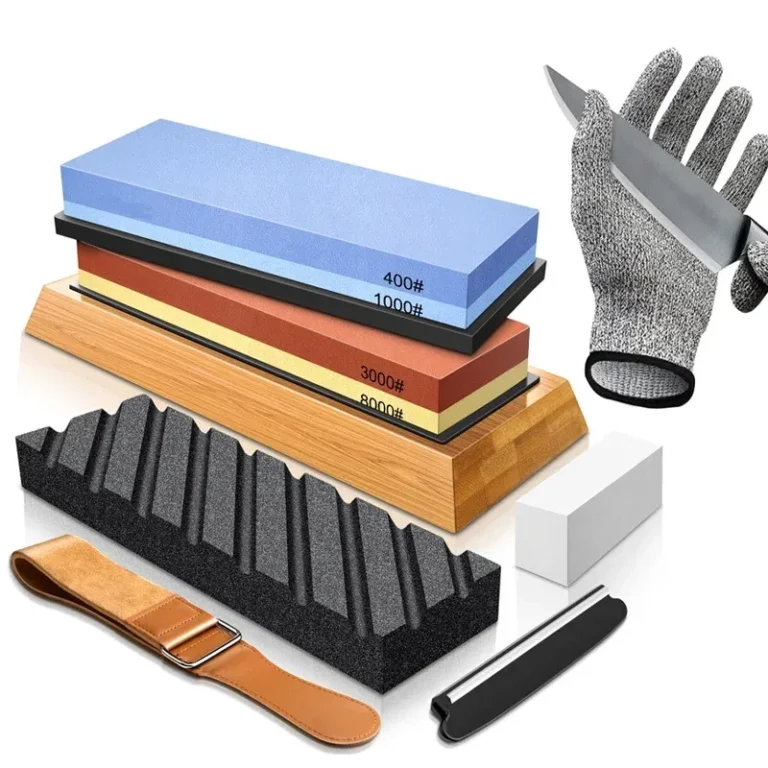
- Whetstones (Sharpening Stones): These are the traditional tools favored by many culinary professionals for their control and ability to achieve extremely fine edges. Whetstones are flat blocks made of abrasive material, requiring the user to manually guide the knife blade across their surface at a specific angle. They come in various grits (coarseness levels) to allow for everything from major repairs to ultra-fine polishing. Learning to use a whetstone takes practice but offers unparalleled results.
Choosing between them often depends on your desired level of precision, available time, and willingness to learn a new skill.
The Step-by-Step Guide to Sharpening Your Knives
Mastering knife sharpening involves a systematic approach, focusing on preparation, technique, and a bit of finesse. Whether you're using a simple slot sharpener or a traditional whetstone, following these steps will help you achieve a clean, sharp edge.
Preparing Your Station and Knife
Before you even touch the sharpener to the blade, setting up properly is crucial. First, ensure you have a stable, flat surface for your sharpener. A kitchen counter or a sturdy workbench works well.
If your sharpener has a non-slip base, great. If not, placing a damp cloth or paper towel underneath it can prevent it from sliding around during use, which is a key safety precaution.
Next, make sure your knife is clean and dry. Any food residue can interfere with the sharpening process and might even get ground into the blade. A clean knife also helps prevent cross-contamination.
Using Countertop Slot Sharpeners
Countertop slot sharpeners are a popular choice for their straightforward design. Most have at least two slots: one typically marked "Coarse" or with a low number (e.g., 1), and another marked "Fine" or with a higher number (e.g., 2 or 3).
- Select the Slot: For a moderately dull knife, start with the coarse slot to re-establish the edge. If your knife is only slightly dull, you might be able to go straight to the fine slot.
- Position the Knife: Place the heel of the knife blade (the part closest to the handle) into the designated slot.
- Apply Gentle Pressure: Hold the sharpener firmly with one hand. With the other hand, grip the knife handle and apply moderate, even pressure.
- Pull Smoothly: Pull the knife towards you, out of the slot, in one continuous, smooth motion. Imagine you are trying to shave a thin layer off the sharpening surface. Avoid sawing back and forth.
- Repeat: Typically, 3 to 5 full passes through the coarse slot are sufficient.
- Hone the Edge: Move to the fine slot and repeat the same pulling motion for another 5 to 10 passes. This step polishes the edge, making it sharper and smoother.
- Clean Up: Wipe the blade clean with a damp cloth to remove any metal particles.
Key Insight: The angle is pre-set in these sharpeners, so your main job is consistent pressure and a smooth, single pull.
Mastering the Whetstone: A Visual Skill
Whetstones, or sharpening stones, offer the most control but require practice to master. They come in different grits, from coarse (around 200-400) for repairing major damage to fine (around 3000-8000+) for polishing to a razor’s edge. As of 2026, manufacturers still widely offer stones in these ranges.
- Prepare the Stone: If you're using a water stone, submerge it in water until the bubbles stop rising (usually 5-15 minutes, check manufacturer instructions). Oil stones require a thin layer of honing oil.
Image source: Bing (Web (fair-use with source credit))
Stabilize the Stone: Place the wet or oiled stone on a non-slip base, a damp cloth, or a dedicated stone holder. Ensure it's stable and won't move.
Find the Angle: This is the most critical part. For most Western-style kitchen knives, a 15-20 degree angle is standard. To find this, imagine the blade is flat on the stone; then lift it up so the spine is about as high as the thickness of the blade itself (for 20 degrees) or even less (for 15 degrees). Consistent angle is paramount.
Sharpen One Side: Place the heel of the knife on the stone at your chosen angle. Apply gentle, even pressure and pull the knife towards you across the stone, moving the blade from heel to tip to cover the entire edge. Think of it as "sweeping" the blade.
Feel for a Burr: After several passes (5-10 depending on grit and dullness), gently run your fingertip away from the edge on the side opposite where you just sharpened. You should feel a tiny ridge of metal, this is the burr.
Sharpen the Other Side: Flip the knife over and repeat steps 4 and 5 on the other side until you feel a burr form on the original side.
Refine the Edge: Move to a finer grit stone and repeat the process, using lighter pressure. This refines the edge and removes the burr. You might progress through several grits for the sharpest results.
Clean and Test: Rinse the blade and stone to remove metal particles. Test the sharpness.
Visual Cue: Imagine you’re trying to lay the entire length of the blade’s edge flat against the stone at the correct angle, then smoothly moving it.
Common Mistakes When Using Manual Sharpeners
Even with the best intentions, it's easy to make a few missteps when sharpening your knives. Being aware of these common errors can help you avoid them and achieve better results.
Over-Sharpening and Damaging Your Blade
One of the most frequent mistakes is simply sharpening too much or with too much force. Every sharpening action removes a small amount of metal from your blade. Overdoing it, especially with coarse grit stones or aggressive slot sharpeners, can significantly shorten the lifespan of your knife.
You might also grind away too much material, which can weaken the blade or change its profile.
The goal is to sharpen only as much as needed to restore the edge. For routine maintenance, a few passes on a fine setting or a finer grit whetstone are often enough. Aggressive sharpening is only needed for very dull or damaged blades.
Paying attention to the tactile feedback, the sound and feel of the blade on the abrasive, can help you gauge how much work is being done.
The Wrong Angle Means the Wrong Edge
For countertop slot sharpeners, the angle is usually pre-set and consistent. The challenge here is more about consistent pressure and a smooth pull. However, with whetstones, maintaining the correct angle (typically 15-20 degrees per side for kitchen knives) is absolutely critical.
If your angle is too steep, you'll create a brittle edge that can chip easily. If it’s too shallow, the edge might not be strong enough for everyday use.
The National Institute of Standards and Technology (NIST) provides guidelines on knife edge angles in various contexts, noting that precision in the angle is key to optimal cutting performance. Consistently achieving that precise angle requires practice and often a bit of visual or tactile guidance, such as using angle guides designed for whetstones or simply developing a feel for it over time. A wavering angle will result in an uneven, ineffective edge.
Testing Your Knife's Sharpness
You’ve gone through the sharpening process, but how do you know if it actually worked? The most practical and widely used test is the paper test.
Grab a piece of standard printer paper (around 20 lb bond weight is good). Hold the paper vertically by one edge. Take your knife and try to slice through the paper with a smooth, drawing motion.
- A sharp knife will slice cleanly through the paper with little to no resistance, almost as if it were butter. The paper won’t snag, tear, or fold ahead of the blade.
- A dull knife will snag, tear, or fold the paper, requiring you to force the cut. You might hear a tearing sound rather than a clean slice.
Another indicator is how the knife performs on softer foods. If you can slice through a ripe tomato or the skin of an onion with ease, without the food collapsing or the blade skidding, your knife is likely sharp.
Maintaining Your Sharpener and Knives Long-Term
Proper care extends the life of both your knives and your sharpening tools. After each sharpening session, it’s essential to clean both.
- Knife Cleaning: Always wipe your knife blade thoroughly with a damp cloth to remove any metal particles (swarf) created during sharpening. Then, dry it completely to prevent rust.
- Sharpener Cleaning:
- Slot Sharpeners: Many have removable collection trays for the metal dust. Empty these regularly. Wipe down the exterior with a damp cloth. Avoid submerging these in water unless the manufacturer explicitly states it's safe, as this can damage the abrasive slots or housing.
- Whetstones: Rinse them thoroughly with clean water to remove metal filings and slurry. If the stone becomes clogged with debris, you might need to "flatten" it using a flattening stone or diamond plate. Manufacturer instructions will guide you on the best way to clean and maintain specific stone types.
Regular honing with a steel or the fine slot on your sharpener between full sharpening sessions will also help maintain the edge and reduce how often you need to do a more intensive sharpening.
When to Consider Alternatives or Professional Help
While manual knife sharpeners are excellent tools, they aren't always the best solution for every situation. If you find yourself consistently struggling to get a good edge or if your knives are highly specialized or very expensive, it might be time to explore other options. Electric knife sharpeners offer speed and convenience, often with multiple sharpening stages, but they can remove more metal than manual methods if not used carefully.
Honing steels, often confused with sharpeners, are actually for realigning a slightly bent edge, not for grinding away metal. If your knife edge is chipped or severely damaged, manual sharpeners may not be sufficient. Professional sharpening services, while an added cost, can handle significant repairs and restore even severely damaged blades with specialized equipment and expertise.
Frequently Asked Questions About Manual Knife Sharpeners
How often should I sharpen my knives?
Sharpening frequency depends heavily on usage and knife quality. For kitchen knives used daily, sharpening every 1-3 months is a common guideline. However, if you notice your knife is struggling to cut through tomatoes or soft bread, it's likely time for a sharpening regardless of the calendar.
Regular honing can extend the time between sharpenings.
Can I use any sharpener on any knife?
Generally, yes, but with caveats. Most kitchen knives can be sharpened with slot sharpeners or whetstones. Very hard steel knives (often found in high-end Japanese knives) might require diamond abrasives or specialized whetstones.
Serrated knives require specialized serration sharpeners and are not typically sharpened with standard manual tools.
What's the difference between sharpening and honing?
Sharpening removes metal to create a new, sharp edge. Honing, using a steel or fine slot, realigns a slightly bent or rolled edge. Honing is a maintenance task you can do frequently to keep a knife sharp between full sharpenings.
Sharpening is a more aggressive process that restores the edge itself.
How can I tell if my knife is too dull to sharpen myself?
If your knife has visible chips, dents, or a severely bent edge that you can’t straighten with honing, it might be beyond a simple manual sharpening. Significant damage or a blade that’s already very thin might be better handled by a professional. Our research shows that attempting to sharpen heavily damaged blades with basic tools can sometimes worsen the problem.