Why Does My Knife Sharpener Remove Uneven Amounts of Metal?
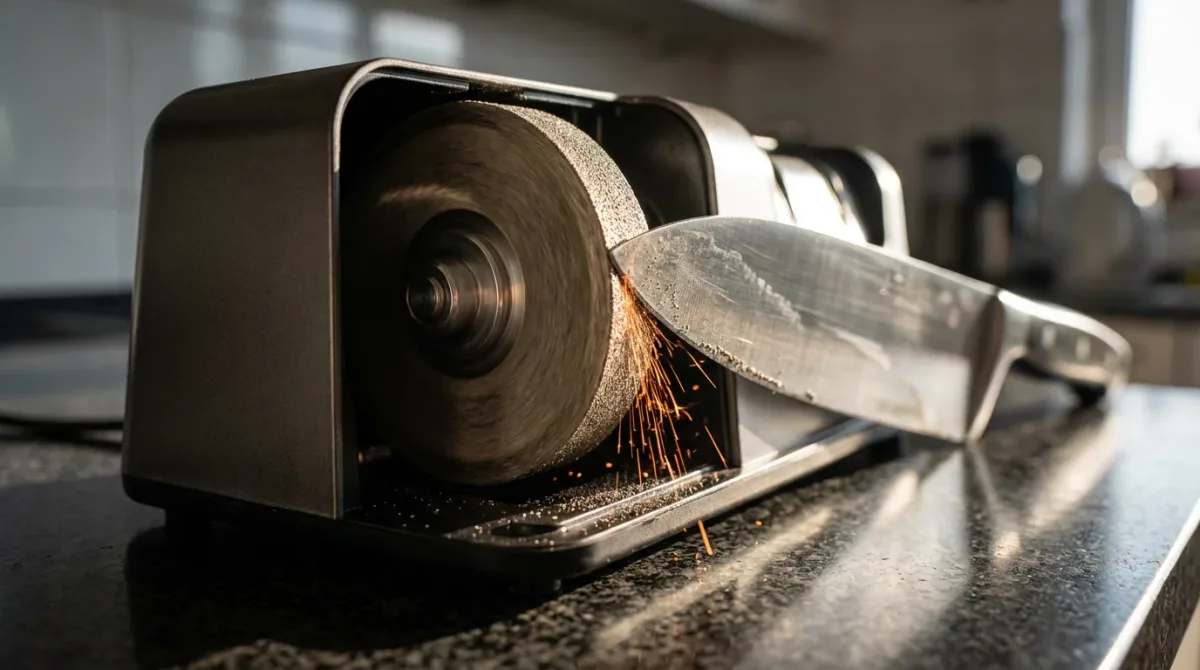
Image source: Bing (Web (fair-use with source credit))
Why Your Knife Sharpener Seems to Remove Uneven Metal
You've probably noticed it: one side of your knife blade looks like it's been through a sandblaster, while the other side seems relatively untouched by your sharpener. This can make you wonder if your sharpener is faulty or if you're doing something wrong. The good news is that this uneven metal removal is often a common, understandable phenomenon with straightforward explanations.
The way a knife sharpener interacts with a blade is all about angles and consistency. Most knife blades are ground to a specific bevel angle, typically between 15 to 25 degrees per side, according to manufacturer specifications for common kitchen knives. When your sharpener removes uneven amounts of metal, it means the consistent angle needed for symmetrical grinding isn't being met on both sides of the blade.
Quick Answer: It's Usually About Angle and Blade Symmetry
Your knife sharpener removes uneven amounts of metal primarily because the blade isn't held at a perfectly consistent angle on both sides. Imperfect factory grinds on the knife blade itself also contribute. Worn sharpening slots or uneven sharpening stone surfaces can further exacerbate this issue.
Core Explanation: How Sharpening Works and Where Unevenness Happens
Sharpening a knife is fundamentally about grinding metal away from the very edge of the blade to restore a sharp point. Think of a knife's edge as a tiny V-shape. Sharpening aims to make both sides of that V meet at a fine apex.
This is achieved by abrading material from each bevel, the angled surfaces that form the edge.
When you use a sharpener, whether it’s a pull-through device with fixed slots or a freehand method with a whetstone, the goal is to present the blade’s bevel to the abrasive material at a consistent angle. If one side of the blade spends more time in contact with the abrasive, or if the angle of contact is steeper on one side, more metal will be removed from that side. This is akin to sanding two identical pieces of wood; if you apply more pressure or sand for longer on one piece, it will become thinner.
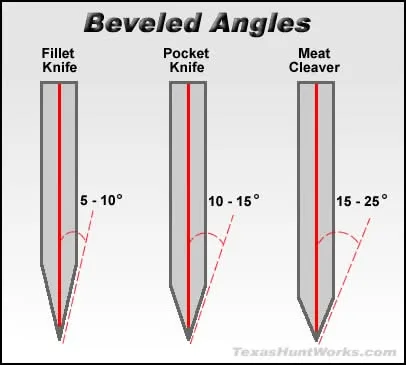
Image source: Bing (Web (fair-use with source credit))
The ideal scenario is perfectly symmetrical grinding, resulting in a sharp edge where both bevels are identical. However, achieving this requires precision from both the knife manufacturer and the user. Deviations in either the initial blade creation or the sharpening process itself will lead to visible differences in metal removal.
This isn't necessarily a failure of the sharpener, but rather a reflection of the physics of abrasion and the geometry of the blade.
Common Culprits: The Real Reasons for Uneven Metal Removal
Several factors can lead to your knife sharpener removing uneven amounts of metal from the blade. Most of these stem from either the knife itself or how you're using the sharpening tool. Understanding these common culprits is the first step to correcting the issue.
- Inconsistent Sharpening Angle: This is the most frequent reason. When you move the knife through a sharpener, especially a pull-through type, it's easy for the angle to fluctuate. If you don't hold the blade at precisely the same angle on both sides as you slide it, one side will receive more abrasion. Imagine trying to draw a perfect V; if one line is straighter or longer than the other, the V will be lopsided.
- Asymmetrical Factory Grind: Not all knives are created equal from the factory. Some may have a slight imbalance in their initial grind. One side might have a more aggressive bevel or be slightly thicker than the other. Your sharpener will try to correct this, and in doing so, it may appear to remove more metal from one side to match the other.
- Worn Sharpening Slots/Stones: Over time, the abrasive surfaces of a sharpener can wear down unevenly. For pull-through sharpeners, the V-shaped slots can become wider or more angled on one side due to repeated use. For whetstones, it's common for users to create a hollow or uneven surface if not properly flattened and maintained. This wear pattern will then transfer to your knife's edge.
- Blade Damage: If your knife has a significant nick, chip, or a bent tip, the sharpener will need to remove more material in that specific area to try and repair the damage. This localized grinding can create the appearance of uneven metal removal across the entire blade.
- User Technique: Beyond just the angle, how you move the knife matters. Jerky motions, inconsistent pressure, or starting and stopping mid-stroke can all lead to uneven abrasion. It’s a fluid motion that requires practice to perfect.
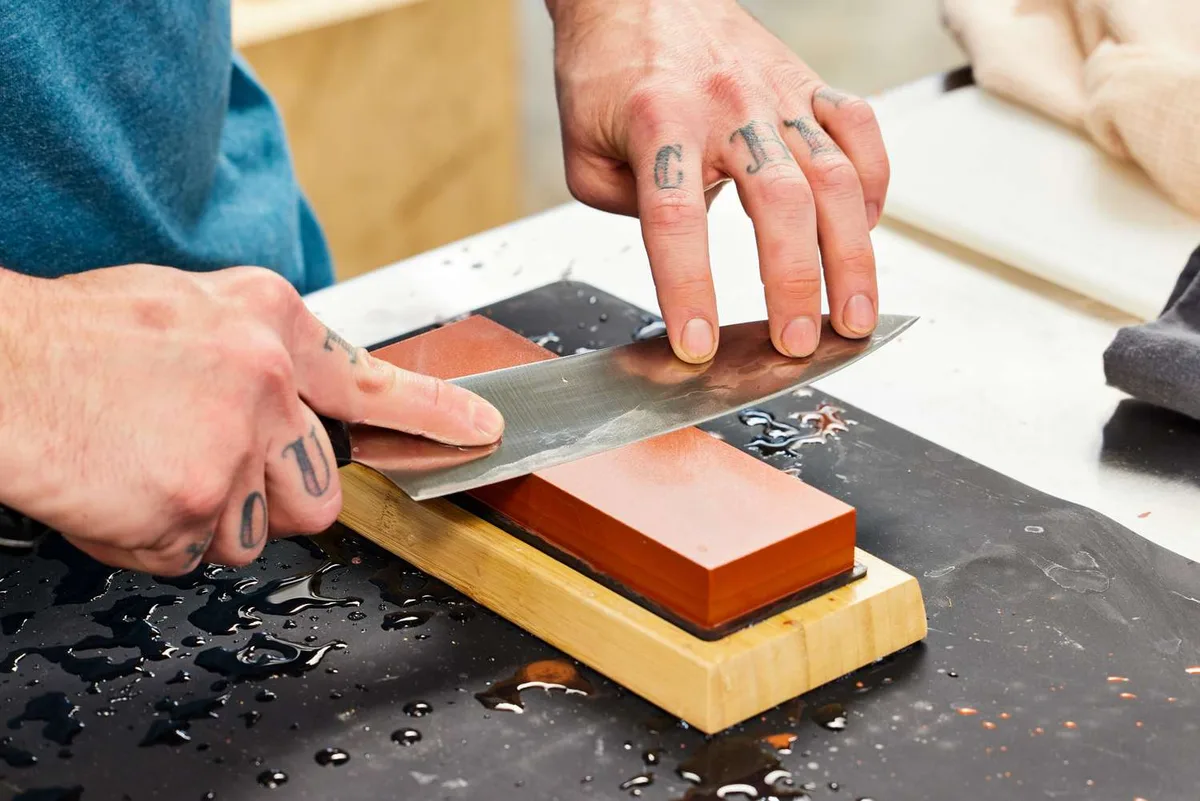
Image source: Bing (Web (fair-use with source credit))
Recognizing these issues is key. If you're seeing uneven wear, it’s helpful to examine your knife for any obvious damage and then consider how consistently you're applying the sharpening technique.
Visualizing the Problem: What to Look For on Your Blade and Sharpener
To truly understand why your knife sharpener is removing uneven amounts of metal, it helps to know what you're looking for, both on your blade and on the sharpener itself. This isn't about guessing; it's about observing the physical evidence.
On Your Knife Blade:
- The Edge Appearance: Hold your knife blade up to a good light source, angling it so you can see the very edge.
- Uneven Grinding: You might see that one side of the edge looks shinier or smoother than the other, indicating more metal was removed. This difference might be subtle or quite pronounced.
- "Rolled" or Bent Edge: Sometimes, the sharpener can push the very fine edge material over to one side without actually grinding it away evenly. This looks like a bent sliver of metal along the edge.
- Nicks and Chips: Look for small divots or missing pieces along the cutting edge. These are signs of damage that require targeted metal removal to fix, which naturally leads to unevenness.
- Thickness Variation: If you look at the blade from the spine towards the edge, you might notice one side appears thicker than the other, suggesting an unbalanced initial grind.
On Your Knife Sharpener:
- Pull-Through Sharpeners:
- Slot Wear: Examine the V-shaped slots. Do they look polished or significantly wider on one side? Gently run a fingernail along the abrasive material in the slot. If one side feels noticeably smoother or less aggressive, it's likely worn.
- Abrasive Material: Look at the actual sharpening surfaces (ceramic, diamond, carbide). Do they appear equally worn down on both sides of the V?
- Whetstones:
- Surface Flatness: A whetstone should ideally be perfectly flat. If you've used it a lot, you might notice a dished-out area in the center or one side that's worn down more than the other. You can test flatness by laying a straight ruler across the stone in multiple directions. Any gap means it needs flattening.
- Uneven Abrasive Grit: While less common, sometimes the grit distribution can be uneven, especially on cheaper stones.
For example, if you have a pull-through sharpener and notice the carbide sharpening slot on the left side is significantly more polished and shiny than the right, that’s a strong indicator the sharpener itself is contributing to uneven metal removal. Similarly, if your whetstone has a noticeable dip where you typically place the knife, that’s where metal will be removed preferentially. This visual inspection is critical for diagnosis.
Fixing Uneven Sharpening: Practical Steps to Take
If you've identified that your knife sharpener is removing uneven amounts of metal, don't despair. You can often correct this with a few focused steps. The goal is to achieve greater consistency, whether that’s in your technique or by addressing wear on your tools.
1. Focus on Consistent Angle and Pressure
This is the most critical step, especially for freehand sharpening or using pull-through sharpeners.
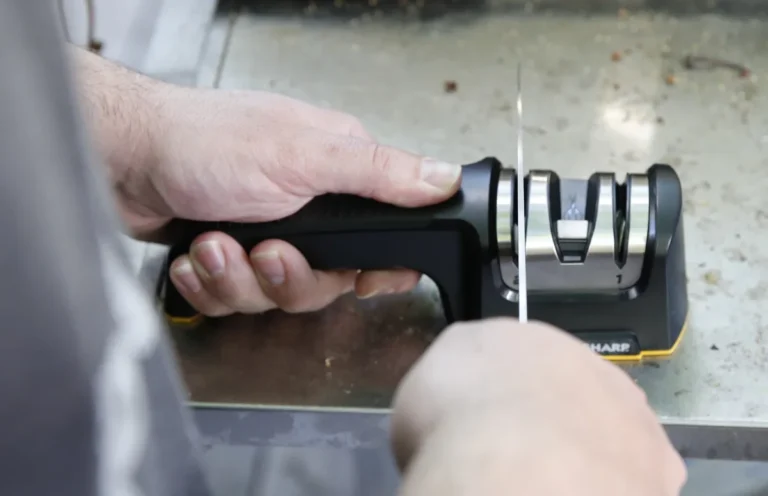
- For Pull-Through Sharpeners: Ensure the blade is making full contact with both abrasive surfaces within the slot. Don't force it at an awkward angle; let the guides do their job, but ensure the blade sits naturally. Some users gently rock the blade side-to-side within the slot to try and engage both sides more evenly, though this requires practice.
- For Whetstones: Maintain a steady angle throughout the stroke. Many people find it helpful to use a sharpening guide or jig, at least initially, to get a feel for the correct angle (often 15-20 degrees per side for kitchen knives). Move the blade in a smooth, controlled motion, alternating sides with each pass or every few passes.
- Pressure: Apply consistent, moderate pressure. Too much pressure can cause uneven wear and damage the blade. Too little might mean it takes forever to sharpen. Find a balance that allows the abrasive to work effectively without forcing the issue.
2. Maintain Your Sharpening Tool
Your sharpener, like your knife, needs care to function optimally.
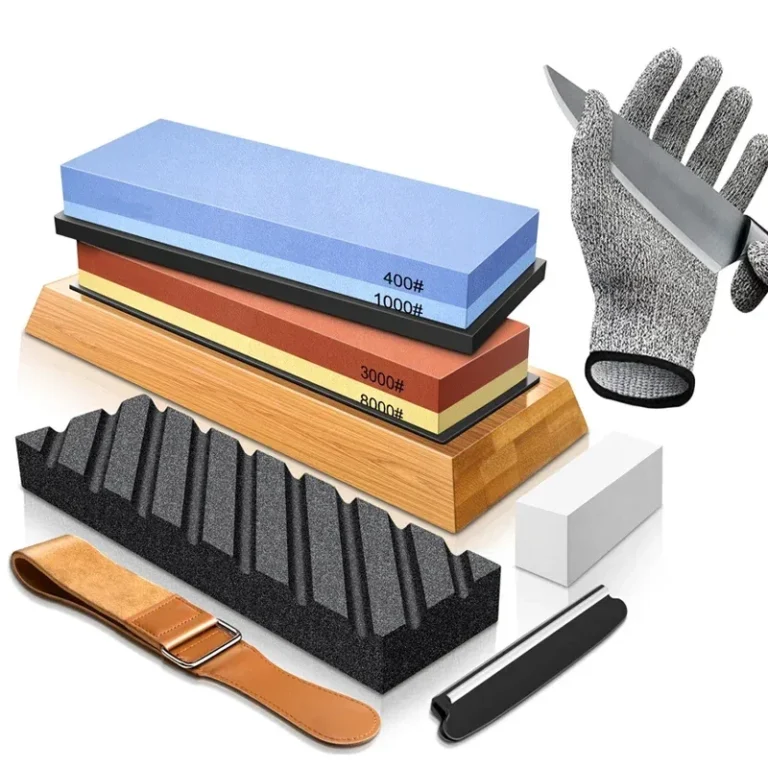
- Flatten Whetstones: Regularly flatten your whetstones using a flattening stone or a piece of silicon carbide grit on a flat surface. This restores a level plane, ensuring even contact with the knife. This is crucial because a dished stone will always result in uneven sharpening.
- Inspect Pull-Through Slots: If you use a pull-through sharpener, check the abrasive elements for excessive wear. If one side is clearly more worn, it might be time to replace the sharpener, as the guides are often integral and not user-replaceable.
- Clean Your Sharpener: Remove any metal filings or debris that can accumulate in slots or on stones. These can interfere with the sharpening process and lead to inconsistent results.
3. Address Blade Issues
If the unevenness is due to the knife itself, you’ll need to work with those limitations.
- Correcting Uneven Grinds: For knives with significant asymmetry, you might need to spend more passes on the side that requires more metal removal. Be patient; it can take time to equalize the bevels. Monitor the edge visually to avoid over-sharpening.
- Repairing Damage: For small nicks and chips, simply allow the sharpening process to grind away the damaged material. For larger damage, you might need to use a coarser grit sharpening stone initially to remove the bulk of the damaged area before moving to finer grits.
By consistently applying these steps, you can significantly reduce or eliminate the problem of uneven metal removal and achieve a sharper, more evenly ground blade.
Choosing the Right Sharpener for Consistent Results
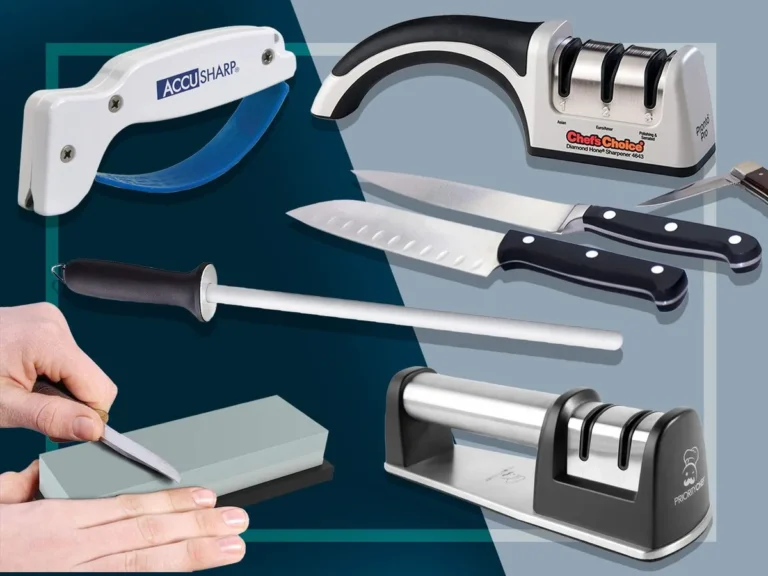
The type of knife sharpener you use plays a significant role in how evenly metal is removed from your blade. While technique is always important, some sharpeners are designed to promote consistency more readily than others, especially for home users. Understanding the strengths and weaknesses of each can help you choose a tool that minimizes unevenness.
Pull-Through Sharpeners: Convenience with Caveats
These are popular for their ease of use. You simply draw the knife blade through pre-set angled slots.
- Pros: Very fast and requires minimal skill. Good for quick touch-ups. Many models have multiple stages for coarse and fine sharpening.
- Cons: The fixed angles might not match your knife's original grind. The slots can wear down unevenly over time, leading to inconsistent results. They can remove more metal than necessary if not used carefully.
- Best For: Users who prioritize speed and simplicity and have a range of common kitchen knives. Look for models with ceramic or diamond abrasives for better longevity.
Whetstones (Sharpening Stones): Precision and Control
Whetstones, typically made from natural or synthetic stones, offer the highest degree of control over the sharpening process.
- Pros: Allows for precise angle control, can sharpen any type of blade, and removes minimal metal when used correctly with finer grits. Offers the sharpest possible edge.
- Cons: Requires significant practice to master consistent angles and techniques. Stones need regular flattening. Can be time-consuming.
- Best For: Enthusiasts, chefs, or anyone who values precision and wants to achieve the best possible edge on their knives. Requires dedication to learn.
Electric Sharpeners: Speed with Guided Precision
Electric sharpeners use motorized abrasive wheels or belts to sharpen the blade quickly. They typically have guide slots to help maintain the angle.
- Pros: Very fast and effective. The guide slots help ensure a consistent angle, reducing user error. Some offer multiple sharpening stages.
- Cons: Can remove a substantial amount of metal quickly, potentially shortening the lifespan of knives if overused. The fixed angles might not be ideal for all knives.
- Best For: Users who want speed and consistent results without the steep learning curve of whetstones. A good option for busy kitchens.
Honing Steels (Sharpening Steels): For Maintenance, Not Major Sharpening
It's important to distinguish honing steels from sharpening systems. Steels realign the existing edge, they don't typically remove significant amounts of metal.
- Pros: Excellent for daily maintenance to keep an edge sharp between actual sharpening sessions.
- Cons: Does not sharpen a dull knife; it only realigns a bent or misaligned edge.
- Best For: Daily upkeep of already sharp knives.
When selecting a sharpener, consider your skill level, the types of knives you own, and how much time you're willing to invest. For most people looking to avoid uneven metal removal without becoming a sharpening expert, a good quality electric sharpener or a well-maintained pull-through sharpener with ceramic or diamond stages can offer a good balance of ease of use and consistent results. If precision is paramount, mastering whetstones is the ultimate path.
Mistakes to Avoid When Sharpening Your Knives
Even with the right tools, certain common mistakes can lead to uneven metal removal, poor results, or even damage to your knives. Being aware of these pitfalls can save you frustration and help you achieve a consistently sharp edge.
1. Inconsistent Angle Application
- The Mistake: This is the most common error. Your hand naturally shifts, or the knife slips slightly, changing the angle at which the blade contacts the abrasive. This means one side gets more grinding than the other.
- Why it Matters: Leads directly to uneven bevels and more metal removed from one side.
- How to Avoid: Practice holding a consistent angle. Use sharpening guides if needed, especially with whetstones or electric sharpeners. For pull-throughs, ensure the blade enters the slot straight and without excessive wobble.
2. Over-Reliance on Coarse Grits
- The Mistake: Using very coarse sharpening materials (like extremely aggressive carbide sharpeners) for routine sharpening. These remove metal very quickly.
- Why it Matters: Coarse grits remove a lot of material. If your angle is inconsistent, you’ll rapidly create uneven bevels and significantly shorten your knife's lifespan.
- How to Avoid: Reserve coarse grits for repairing damaged knives (chips, significant dullness). For regular sharpening, opt for finer grits that remove less material and offer more control.
3. Not Maintaining Your Sharpener
- The Mistake: Using a whetstone that hasn't been flattened, or a pull-through sharpener with worn-out slots.
- Why it Matters: A dull, uneven, or hollowed sharpening surface will imprint its imperfections onto your knife, causing uneven grinding and a less effective edge.
- How to Avoid: Regularly flatten your whetstones. Inspect pull-through sharpeners for visible wear in the slots. Clean them to remove metal dust and debris that can impede performance.
4. Pushing or Pulling Too Hard
- The Mistake: Applying excessive force, either pushing the knife into the sharpener or pulling it through.
- Why it Matters: Too much pressure can force the blade into an unnatural angle, chip the abrasive material, or even damage the knife's edge. It also makes controlling the angle much harder.
- How to Avoid: Use light to moderate, consistent pressure. Let the abrasive material do the work. The goal is to shave off metal, not to gouge it.
5. Sharpening a Dirty Knife
- The Mistake: Putting a knife that still has food residue on it into the sharpener.
- Why it Matters: Food particles can clog the abrasive surfaces of your sharpener, reducing its effectiveness and potentially leading to inconsistent results. They can also get ground into the blade itself.
- How to Avoid: Always wash and dry your knife thoroughly before sharpening. This ensures a clean abrasive surface and a cleaner sharpening process.