How to Care for Kitchen Knives?
Keeping your kitchen knives sharp and in good condition is crucial for both safety and efficiency. Dull knives are frustrating and can lead to accidents by requiring extra force, increasing the chance of slipping. Understanding a few key principles and adopting simple practices can keep your blades performing like new for years.
Our research indicates consistent, proper care is key, especially for managing the fine edge of your blades. Manufacturer specifications for many professional-grade chef's knives recommend a sharpening angle of approximately 15 to 20 degrees to maintain optimal cutting performance. This article breaks down the essentials for keeping your knives in prime condition.
Quick Answer
Caring for kitchen knives involves regular honing to realign edges, periodic sharpening to restore sharpness, and meticulous hand-washing followed by immediate drying. Avoid dishwashers and abrasive surfaces. Proper storage in a knife block or on a magnetic strip protects blades.
Honing vs. Sharpening: What's the Difference and When to Do It
It’s easy to get honing and sharpening mixed up, but they’re different steps in keeping your knife’s edge in fighting shape. Think of it like maintaining a saw: you might need to straighten some teeth (honing) before you actually need to file them down (sharpening).
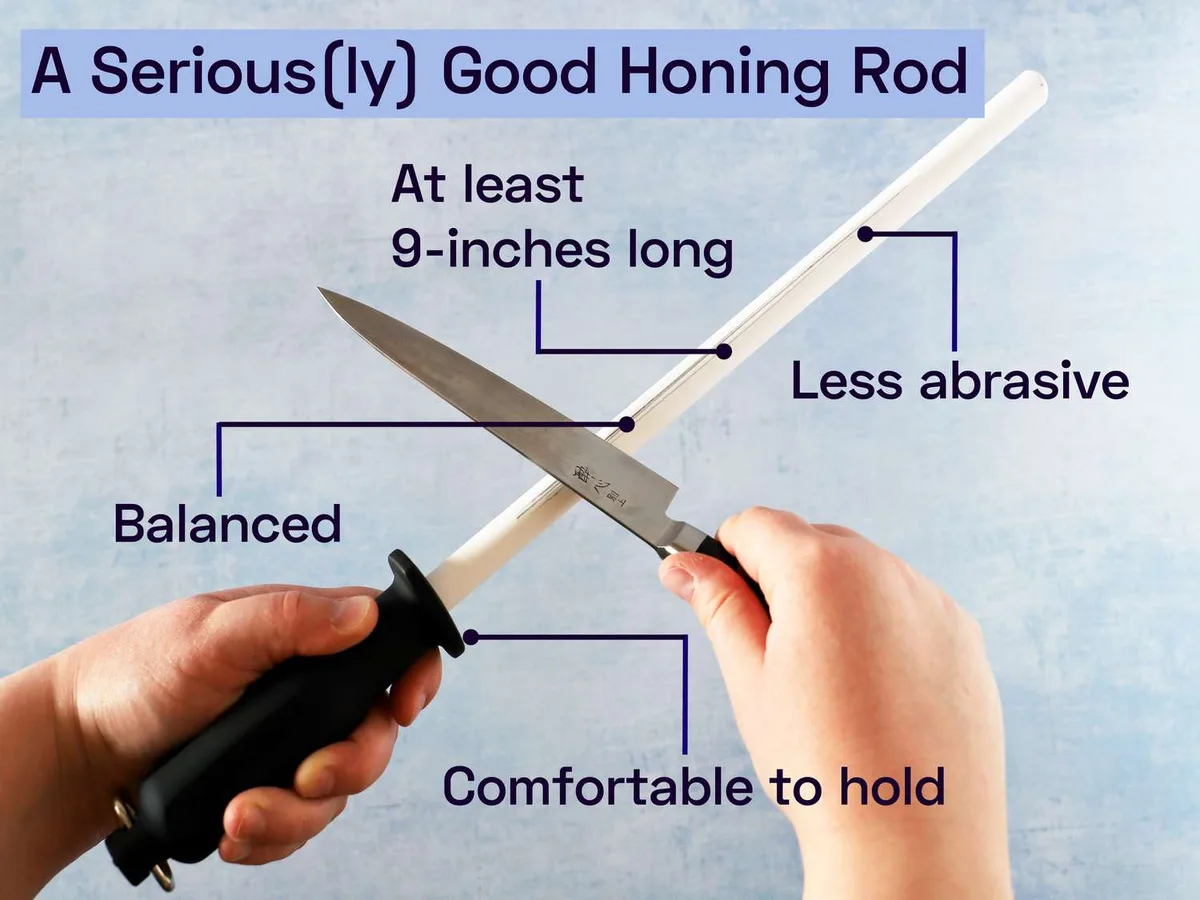
Image source: Bing (Web (fair-use with source credit))
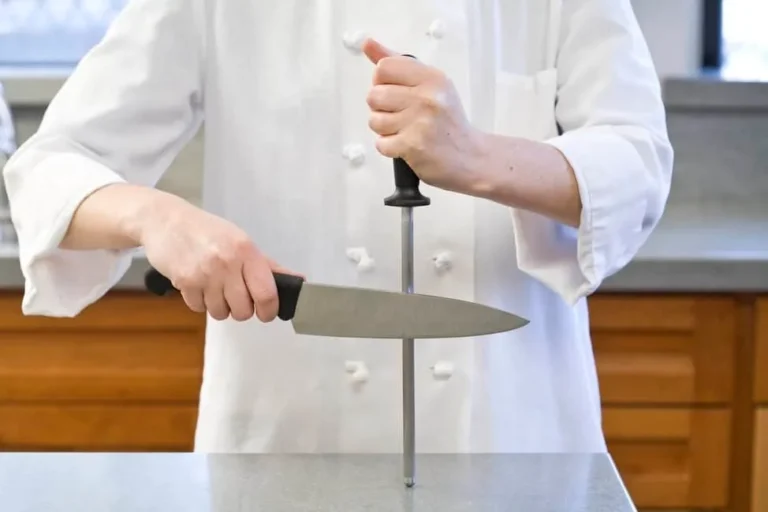
Honing is a maintenance task. Over time, the microscopic teeth on the edge of your knife get bent out of alignment as you cut. A honing rod, often made of steel or ceramic, is used to gently straighten these teeth back into a single line.
This process doesn't remove metal; it simply realigns the existing edge. You should hone your knives frequently, ideally before or after each use, to keep them cutting smoothly. It’s what makes a knife feel sharp between actual sharpening sessions.
Sharpening, on the other hand, is for when honing isn’t enough. This is when the edge has actually become dull, meaning metal has worn away or become significantly blunted. Sharpening involves removing a small amount of metal from the blade to create a new, sharp edge.
This is a more involved process and should be done less frequently, perhaps only a few times a year, depending on how heavily you use your knives and the type of materials you cut. The goal of sharpening is to restore the keenness of the blade itself.
Straightening the Edge: Your Daily Honing Routine
Your honing rod is your best friend for everyday knife maintenance. Using it regularly means your knives will stay sharper for longer, and you'll postpone the need for full sharpening. This routine is simple and can be done in under a minute.
When to Hone:
- Before each cooking session.
- After washing and drying, if you've done a lot of heavy cutting.
- Any time you notice your knife isn't slicing as cleanly as it usually does, but still has some life left.
The Honing Process:
- Secure the Rod: Place the tip of your honing rod on a stable surface, like a cutting board or a countertop. If your rod has a guard, hold it vertically.
- Grip Your Knife: Hold your knife's handle firmly.
- Find the Angle: Position the heel of the blade (the part closest to the handle) against the rod. Maintain a consistent angle, typically between 15 and 20 degrees, for your knife. For most Western-style knives, 20 degrees is common; for Japanese knives, it might be closer to 15 degrees. If you’re unsure, check your knife manufacturer’s recommendations, which can often be found on their official website.
- The Stroke: Gently draw the knife down the rod in a single, smooth motion, sweeping the entire length of the blade from heel to tip. Apply light, consistent pressure. Imagine you are trying to shave a thin layer off the rod with your blade.
- Repeat on Other Side: Flip the knife and repeat the process on the other side of the blade, maintaining the same angle and pressure.
- Several Passes: Aim for about 5 to 10 strokes on each side. You might hear a faint, smooth scraping sound as you go.
- Test: After honing, carefully wipe the blade and test its sharpness on a piece of paper or a ripe tomato. It should slice cleanly with minimal effort.
Using a steel rod is best for regular honing. Ceramic rods are slightly more abrasive and can offer a bit of sharpening along with the honing, which can be useful if your knife is starting to feel a little duller than usual but doesn't yet warrant a full sharpening session.
Restoring the Grind: How to Truly Sharpen Your Knives
Sharpening is essential when honing no longer brings back the cutting performance. This process involves actually removing metal to create a new, keen edge. Our research shows that while it can seem intimidating, mastering sharpening with stones or other tools significantly extends the life and usability of your knives.
When to Sharpen:
- When honing doesn’t bring back sharpness.
- When the knife struggles to slice through soft foods like tomatoes without squishing.
- When you notice nicks or significant dullness along the blade.
Understanding Sharpening Abrasives:
Sharpening tools use abrasive materials to grind down the metal. The coarseness of these abrasives is measured in "grit."
- Coarse Grit (e.g., 200-1000): Used for repairing chips, fixing significant dullness, or reshaping a damaged edge. These remove metal quickly.
- Medium Grit (e.g., 1000-3000): The workhorse for general sharpening. They effectively restore a keen edge without removing excessive metal.
- Fine Grit (e.g., 3000-8000+): Used for refining and polishing the edge to a razor-sharp finish. These create a smooth, long-lasting keenness.
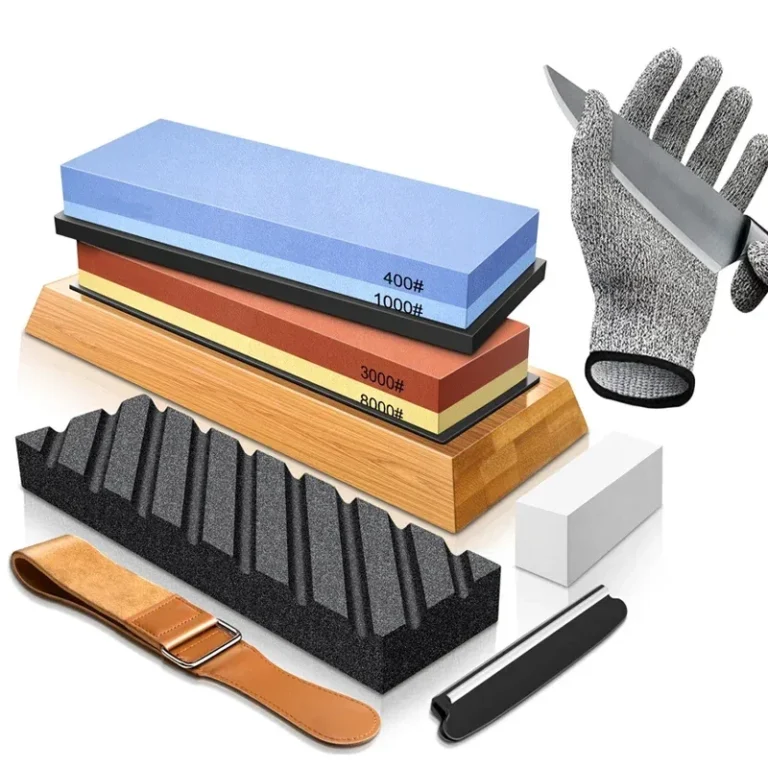
Using a progression of stones, from coarse to medium to fine, is the standard practice for achieving the best results. For example, starting with a 1000-grit stone to set the edge, then moving to a 3000-grit stone to refine it, and finishing with an 8000-grit stone for polishing is a common sequence. This ensures the edge is not only sharp but also durable and smooth.
Choosing Your Sharpening Method: Stones, Rods, and Electric Options
When it comes to restoring that razor-sharp edge, you have several reliable options. Each has its own pros and cons, and the best choice often comes down to your comfort level, desired precision, and how much time you're willing to invest.
1. Sharpening Stones (Whetstones)
These are the traditional tools for knife sharpening and offer the most control. They typically come in water-activated or oil-activated varieties, though water stones are more common for home use.
- Pros: Offers the highest level of control over the sharpening angle and process; can achieve incredibly sharp and refined edges; versatile for various knife types.
- Cons: Requires practice to master the technique; can be time-consuming; stones need maintenance (flattening, soaking).
- Best for: Those who want to truly understand and control the sharpening process, achieve the sharpest possible edge, and have a wide variety of knives to maintain.
How to Use Sharpening Stones (General Steps):
- Prepare the Stone: Soak water stones in water until they stop releasing air bubbles (follow manufacturer instructions). Place the stone on a non-slip surface.
- Set the Angle: Hold the knife at your desired angle (usually 15-20 degrees). Angle guides can be very helpful here.
- Sharpen: Draw the blade across the stone from heel to tip, maintaining the angle. Aim to create a "burr", a tiny curl of metal, on the opposite side of the edge.
- Repeat: Flip the knife and sharpen the other side until a burr forms.
- Progress Through Grits: Move to finer grit stones to refine and polish the edge, removing the burr.
- Clean: Rinse the knife and stone thoroughly.
2. Honing Rods (Beyond Basic Honing)
While primarily for honing, some rods, particularly ceramic ones, have a mild abrasive quality that can do light sharpening. Steel rods are generally not abrasive enough for sharpening.
- Pros: Convenient for quick touch-ups; some ceramic rods can offer a light sharpening effect.
- Cons: Less effective for truly dull or damaged blades compared to stones; limited ability to create a fine, long-lasting edge.
- Best for: Minor dullness and those who want a simple, fast way to maintain an edge that's already reasonably sharp.
3. Electric Sharpeners
These machines use motorized abrasive wheels or belts to sharpen your knives quickly. They often have pre-set angle slots.
- Pros: Very fast and easy to use; requires minimal skill.
- Cons: Can remove more metal than necessary, potentially shortening knife lifespan; less control over the sharpening angle and finish; can overheat the blade if not used carefully.
- Best for: Those who prioritize speed and convenience above all else, and are willing to accept the trade-offs in precision and metal removal.
When choosing an electric sharpener, look for models that offer multiple sharpening stages (coarse, fine) and reputable brands. Always follow the manufacturer’s instructions precisely. For example, many electric sharpeners from well-regarded brands suggest passing each slot 3-5 times to avoid excessive metal removal.
The Dishwasher is the Enemy: Proper Knife Cleaning and Drying
This is one of the biggest mistakes people make, and it can do serious damage to your knives. Putting your good kitchen knives in the dishwasher is a fast track to dulling, rusting, and handle damage. The high heat, harsh detergents, and violent agitation are not kind to finely crafted blades.
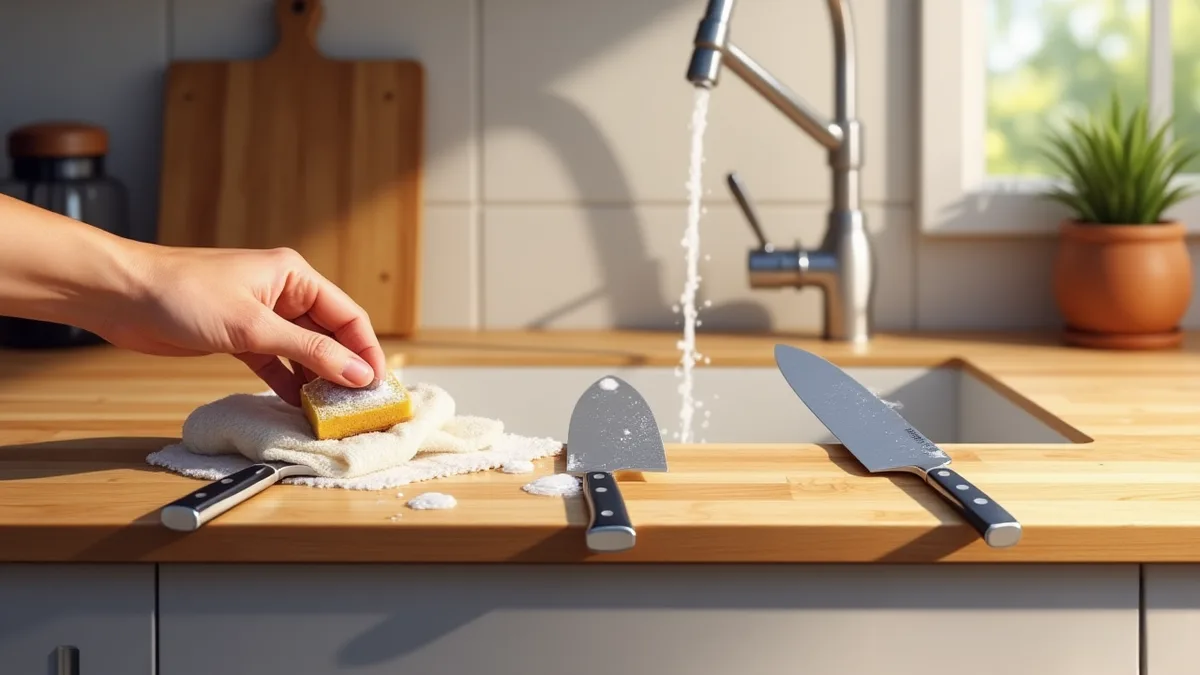
Image source: Bing (Web (fair-use with source credit))
Why Hand Washing is Essential:
- Blade Integrity: Dishwasher detergents are abrasive and can corrode metal over time, especially on carbon steel knives. The high-pressure spray can also chip or bend the delicate edge.
- Handle Longevity: Extreme heat can warp plastic or composite handles, crack wooden handles, and loosen the bond between the handle and the blade tang.
- Safety: Knives can shift during a wash cycle, leading to dangerous exposure of sharp edges when unloading.
The Right Way to Clean Your Knives:
- Wash Immediately: Ideally, wash your knives right after you finish using them. This prevents food acids from etching the blade and dried-on food from becoming difficult to remove.
- Use Gentle Soap: A mild dish soap and warm water are all you need. Avoid abrasive scrubbers that could scratch the blade.
- Wash One at a Time: Handle each knife individually. Wipe the blade away from your hand.
- Rinse Thoroughly: Make sure all soap residue is gone.
- DRY IMMEDIATELY AND COMPLETELY: This is arguably the most critical step after washing. Use a soft, clean towel to thoroughly dry the entire knife, including the blade, handle, and any crevices. For carbon steel knives, this step is non-negotiable to prevent rust. Don't let them air dry.
Following these steps ensures your knives remain free of corrosion and their edges stay pristine, ready for their next task.
Protecting Your Blades: Smart Knife Storage Solutions
Once clean and dry, how you store your knives is just as important as how you clean them. Improper storage can lead to dulling, chipping, and accidental cuts. The goal is to keep the sharp edge protected and prevent it from banging against other hard objects.
Knife Blocks:
A classic for a reason, knife blocks hold knives in individual slots, keeping blades safe and accessible.
- Pros: Keeps knives organized, protected, and readily available; provides a stable resting place.
- Cons: Can take up counter space; slots might not fit all knife sizes or shapes if the block is not versatile.
- Best for: Kitchens with ample counter space and cooks who want their most-used knives within easy reach.
When selecting a knife block, ensure the slots are angled appropriately so you slide the knife in spine-first, protecting the edge from the wood or material of the block.
Magnetic Strips:
These are popular for saving counter space and displaying knives. Magnets hold the blades securely.
- Pros: Saves counter space; allows for easy visibility and selection of knives; keeps blades from touching each other.
- Cons: Requires careful placement and removal to avoid damaging the blade edge; can be a safety hazard if placed within reach of children; requires proper mounting to hold the weight of heavier knives.
- Best for: Those looking for a space-saving solution and who are diligent about placing and removing knives carefully.
To use a magnetic strip safely, place the spine of the knife against the strip first, then gently lower the blade into place. When removing, lift the spine away from the strip first, then pull the blade free.
In-Drawer Storage Solutions:
If you prefer to keep knives out of sight, in-drawer organizers are a great option. These can be trays with slots or magnetic inserts designed for drawers.
- Pros: Keeps knives safely stored and hidden; protects blades from damage within the drawer.
- Cons: Requires dedicated drawer space; less convenient for quick access than blocks or strips.
- Best for: Those who prefer a clutter-free countertop or have concerns about knives being visible.
Using blade guards or sheaths for individual knives when storing them in a drawer is another excellent way to protect the edges. These are typically made of plastic or wood and fit snugly over the blade.
What to Avoid in Storage:
- Loose in a Drawer: Never toss knives loosely into a drawer with other utensils. This is a recipe for dull, damaged blades and potential injury.
- Sink Storage: Leaving knives in the sink, even unwashed, is dangerous and can lead to nicks.
- Crowded Knife Rolls: While professional chefs use knife rolls, they are intended for transport and require careful packing to avoid blades hitting each other. For everyday home storage, they are not ideal.
Proper storage, alongside regular cleaning and sharpening, forms the backbone of good knife care, ensuring your tools remain effective and safe for years.
Common Knife Care Mistakes and How to Avoid Them
We've touched on a few crucial points already, but let's really hammer home some common missteps people make with their kitchen knives. Avoiding these will make a world of difference in how well your knives perform and how long they last. It’s often the little things that cause the most damage over time.
Here's a rundown of what not to do:
- The Dishwasher Dive: Never, ever put your good knives in the dishwasher. The combination of harsh detergents, high heat, and banging around will quickly dull your blades, damage handles, and can lead to rust. Stick to hand washing and immediate drying.
- Cutting on the Wrong Surface: Think about what your knife is slicing through. Cutting on hard surfaces like glass, ceramic, granite, or marble countertops will dull your blade almost instantly. These materials are harder than the steel of your knife, causing the edge to chip and wear down rapidly. Always use a wooden or good quality plastic cutting board. These materials are softer and will protect your knife's edge.
- Using the Wrong Knife for the Job: Every knife has a purpose. Trying to chop through bones with a delicate chef’s knife, or trying to slice crusty bread with a smooth-edged utility knife, puts undue stress on the blade. This can lead to chipping, bending, or premature dulling. Understand what each knife in your set is designed for.
- Letting Them Sit Wet: Moisture is the enemy, especially for carbon steel knives. Leaving a washed knife to air dry, or worse, leaving it wet in a sink or on a drying rack for too long, is a surefire way to develop rust spots. Always dry your knives immediately and thoroughly after washing.
- Ignoring the Honing Rod: Skipping the daily honing is like never tightening a loose screw on your furniture. Your knife might still cut, but it won’t be as efficient or as safe as it could be. Consistent honing keeps the edge aligned and extends the time between sharpenings.
- Sharpening Too Often (or Not Enough): While it’s good to maintain your knives, over-sharpening, especially with aggressive electric sharpeners, can wear down the blade faster than necessary. Conversely, waiting too long to sharpen when a knife is truly dull means you’re using a less effective, potentially more dangerous tool. Pay attention to how your knives perform.
- Improper Storage: Just tossing knives into a drawer or leaving them loose on a counter is dangerous and damaging. They can get nicked, their edges can be dulled by contact with other objects, and they pose a significant injury risk. Use a knife block, magnetic strip, or blade guards.
By actively avoiding these common pitfalls, you're already well on your way to keeping your kitchen knives in excellent working order.
Expert Tips for Keeping Your Knives Razor Sharp for Years
Beyond the basic dos and don'ts, a few expert insights can elevate your knife care game. These are the little tricks and consistent habits that seasoned cooks and chefs swear by. They ensure your knives not only remain sharp but also maintain their structural integrity and aesthetic appeal for decades.
- Invest in Quality: You don't need a hundred knives, but investing in a few high-quality knives made from good steel (like high-carbon stainless steel) makes a huge difference. Better steel holds an edge longer and is more resistant to corrosion. Manufacturer specifications often detail the steel composition and hardness (HRC rating), which are indicators of quality. For example, a hardness rating between 56-58 HRC on the Rockwell scale is generally considered a good balance for most kitchen knives, offering durability and edge retention.
- Understand Your Steel Type: Carbon steel knives are known for their exceptional sharpness and ease of sharpening, but they are more prone to rust and discoloration. Stainless steel is more corrosion-resistant but can be harder to sharpen and may not hold an edge quite as long. Knowing your knife's steel type informs your cleaning and maintenance. For instance, while stainless steel tolerates more neglect, carbon steel demands immediate drying to prevent rust.
- Learn the Correct Angle: This is critical for successful sharpening. Most Western-style knives benefit from a 15-20 degree angle per side. Japanese knives often use a steeper angle, around 10-15 degrees. Using a sharpening guide or marking your blade can help you maintain this angle consistently, especially when new to sharpening stones.
- Don't Be Afraid of the Burr: When sharpening, a key indicator of proper technique is the formation of a "burr", a tiny curl of metal on the opposite edge side. You can feel it by gently running your fingertip away from the edge along the spine. Once you feel a burr along the entire length of one side, flip the knife to create a burr on the other. Then, remove the burr with very light passes on a fine stone or by stropping.
- Stropping for Polish: For a truly razor-sharp edge, consider stropping your knife after sharpening. This uses a leather strop, often treated with fine abrasive compound, to refine and polish the edge, removing microscopic burrs and aligning the very apex of the blade. This technique can significantly enhance your knife's sharpness.
- Regularly Check Your Sharpening Stone: Sharpening stones can become dished or uneven with use, making consistent angle maintenance difficult. Flattening stones, often made of silicon carbide or diamond, resurface your regular sharpening stones, ensuring they remain flat and effective.
- Listen to Your Knife: Over time, you’ll develop a feel for your knives. You'll know when honing isn't enough and sharpening is needed. You’ll hear subtle differences in sound when a blade is sharp versus dull. Trust your senses; they indicate your knife’s condition.
- Consider Professional Sharpening (Selectively): While learning to sharpen yourself is rewarding, if you have expensive or delicate knives, or struggle to get results, consider professional sharpening services. Look for reputable services with experienced technicians. They can provide an expert edge, but continued home maintenance with honing is still crucial.
By incorporating these practices, you're not just maintaining tools; you're investing in your cooking experience.
Frequently Asked Questions About Knife Care
How often should I hone my kitchen knives?
You should hone your kitchen knives frequently, ideally before or after each use. This simple maintenance step realigns the microscopic teeth on the blade's edge, keeping it sharper and safer for longer.
How do I know when my knife needs sharpening instead of just honing?
If honing no longer makes your knife feel sharp, or if it struggles to slice through soft foods like tomatoes without squishing, it's time for sharpening. Dull knives require more force, increasing the risk of slipping.
What's the best material for a cutting board to protect my knives?
Wooden (like maple or bamboo) or high-quality plastic cutting boards are best. They are softer than your knife blades and help prevent dulling and chipping. Avoid glass, stone, or ceramic surfaces.
How should I store my kitchen knives to prevent damage and injury?
Store knives in a knife block, on a magnetic strip, or in a drawer with blade guards. Never store them loosely in a drawer with other utensils, as this can damage the edge and pose a safety risk.
Can I really never put my knives in the dishwasher?
That's correct. You should never put your good kitchen knives in the dishwasher. The harsh detergents, high heat, and vigorous washing action can dull the blade, damage the handle, and cause rust, especially on carbon steel knives.
Always hand wash and dry them immediately.