How Do I Know If My Knife Sharpener Is Working?
Figuring out if your knife sharpener is actually doing its job can feel like guesswork. You spend time sharpening, only to find your knife still struggles with that ripe tomato or that stubborn piece of paper. It’s a common frustration, but knowing the signs can make all the difference.
Our research indicates that most users can determine sharpener effectiveness through simple, observable tests and a bit of tactile feedback. For instance, manufacturer specifications often highlight that a well-maintained edge can cleanly slice through standard 20 lb bond paper, a benchmark many sharpening systems aim for. Let’s get your knives cutting like new.
Quick Answer
Your knife sharpener is working if it consistently creates a sharp, keen edge capable of slicing paper cleanly. You should feel a slight burr form on the opposite side of the blade during sharpening. If tests like the paper or tomato slice fail, your sharpener or technique likely needs adjustment.
The Paper Test: Your First Clue to Sharpness
This is the go-to test for a reason. It’s simple, accessible, and gives you a clear indication of whether your knife has achieved a usable level of sharpness. A truly sharp edge will bite into paper with minimal effort, cleanly separating the fibers.
It’s not about sawing; it’s about a smooth, decisive slice.
Slice Test: Success or Rip?
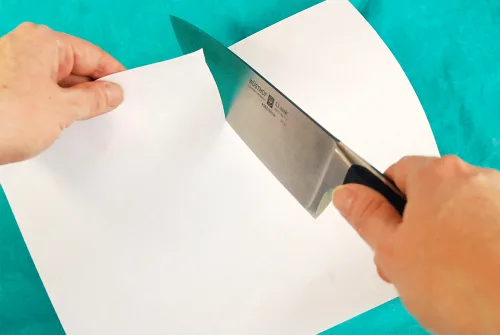
Hold a sheet of standard printer paper (like 20 lb bond paper) vertically by one edge. Position the knife’s edge a little way down from the top. Now, try to slice downwards through the paper.
The goal is a single, fluid motion.
- Success: The knife glides through the paper with very little pressure. It should feel almost effortless, as if the paper is offering no resistance.
- Failure: The paper tears, snags, folds over, or requires significant force to cut. This means the edge isn't keen enough to properly engage and slice the paper fibers.
What a Clean Cut Looks Like
A clean cut means the knife's edge is fine enough to sever the paper's structure without deforming it. You'll see a smooth, straight edge where the knife passed through. If the paper frays or shreds, the edge is likely too coarse, rounded, or simply not present at that section of the blade.
This test is particularly effective at revealing unevenness along the edge, which a duller knife will always struggle with.
The Tomato Test: Proving the Edge
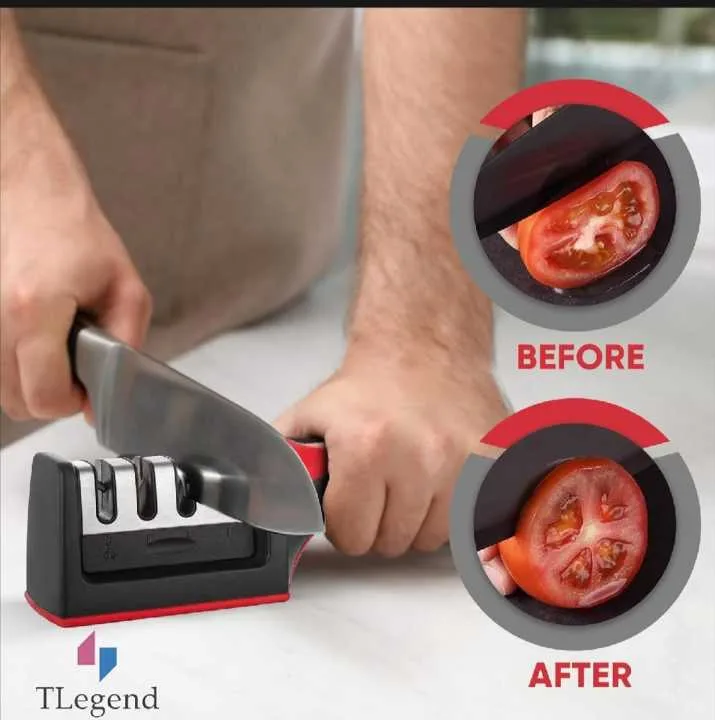
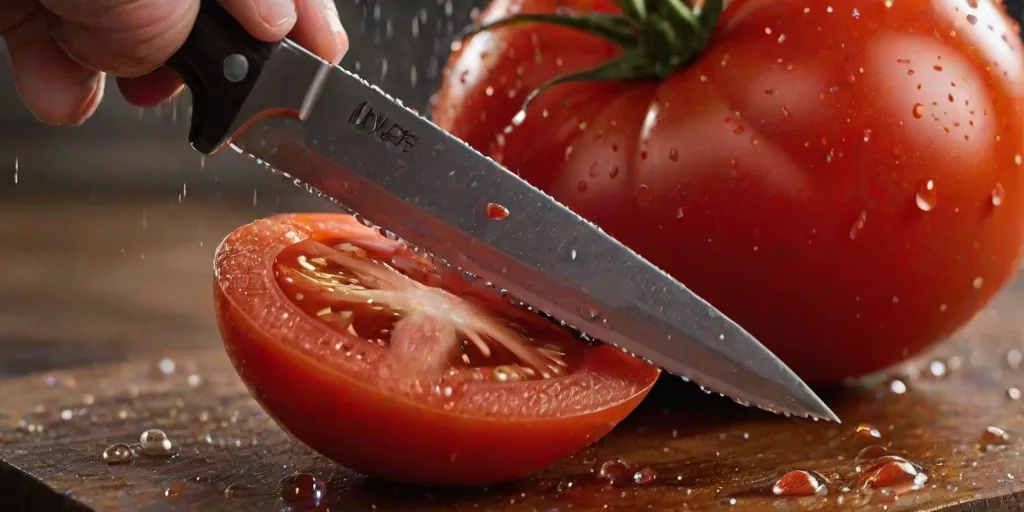
If the paper test is your initial diagnostic, the tomato test is your validation for real-world kitchen performance. A sharp knife should effortlessly pierce the skin of a ripe tomato and slice through its soft interior without squishing it. This test is more demanding than paper because tomato skin offers more resistance, and the flesh is delicate.
Gentle Slice vs. Squish
Place a ripe tomato on a cutting board. Using a light grip, hold the knife and let gravity do most of the work as you attempt to make a thin slice. You’re aiming to let the knife’s weight and sharpness do the cutting.
- Success: The knife’s edge sinks into the tomato skin with minimal pressure and glides smoothly through the flesh, creating a clean, thin slice.
- Failure: The knife slides off the skin, requiring you to press down hard, or it crushes the tomato instead of slicing it. This indicates a dull edge that can’t bite into the skin effectively.
Does it Bite or Slide?
The critical question here is whether the knife "bites" into the surface. A sharp edge is designed to dig into the material. If your knife slides across the tomato's skin, it's essentially telling you that the edge is too dull or too rounded to grip and cut.
This often happens when the sharpening process hasn't created a fine enough apex or has left the edge too obtuse.
Feel the Burr: The Sharpener's Signature
Forming a burr is a crucial indicator that your sharpening process is removing metal and shaping the blade edge correctly. A burr is a tiny, almost imperceptible fringe of metal that curls over to the opposite side of the edge being sharpened. If you're not creating one, your sharpener may not be effectively abrading the steel, or you might be using an incorrect angle.
How to Safely Detect the Burr
After you've completed a few sharpening strokes on one side of the blade, it’s time to check for this metal fringe. Crucially, you must do this safely. With extreme caution, lightly run your fingertip across the edge of the blade. Imagine you're brushing away a stray hair. You are sliding your fingertip from the spine of the knife towards the edge, and then away from the edge on the opposite side. Never run your finger along the length of the edge.
- Success: You'll feel a slight "catch" or a subtle roughness as your finger glides across. This is the burr, a sign that metal has been displaced and is working its way to the other side.
- Failure: Your fingertip glides smoothly across the edge with no noticeable catch. This suggests that either no metal is being removed, or the burr is not forming properly, pointing to a potential issue with the sharpener or technique.
What No Burr Means
The absence of a burr can mean several things. Your sharpener might have worn-out abrasive material that’s no longer effectively cutting steel. Alternatively, you might be using an angle that's too shallow or too steep for the specific steel or sharpener type, preventing proper metal displacement.
For certain very hard steels, it could also indicate that the sharpener's abrasive simply isn't aggressive enough to create a burr, although this is less common with standard kitchen knives.
Inspecting the Edge: A Closer Look
While subjective tests like the paper and tomato slices are great indicators, a visual inspection under magnification can offer definitive proof of your sharpener's work. This step helps you see the microscopic details of the blade's apex, revealing its uniformity and keenness. As of 2026, advancements in portable magnifiers make this accessible for home users.
Magnification for Clarity
If you have a jeweler's loupe, a magnifying glass with at least 10x magnification, or even a good quality smartphone camera with macro capabilities, you can get a clear view. Carefully hold the blade under good light and examine the very apex, the thinnest part of the edge. Move the blade slowly, looking at different sections from heel to tip.
Signs of a Good vs. Bad Edge
- Good Edge: Under magnification, a well-sharpened edge will appear as a very fine, uniform line. You might see a subtle burr still clinging to the apex, which is expected at this stage. The line should be consistent across the visible section.
- Bad Edge: You might see a rounded apex, indicating the sharpener has smoothed the edge rather than creating a fine point. Nicks, chips, or dark spots (indicating unevenness or damaged steel) are also clear signs of a poor sharpening job. If you see a very pronounced, fuzzy burr that you can’t easily remove, it suggests the sharpening process may have been too aggressive or inconsistent.
Sharpening Technique: Are You Doing It Right?
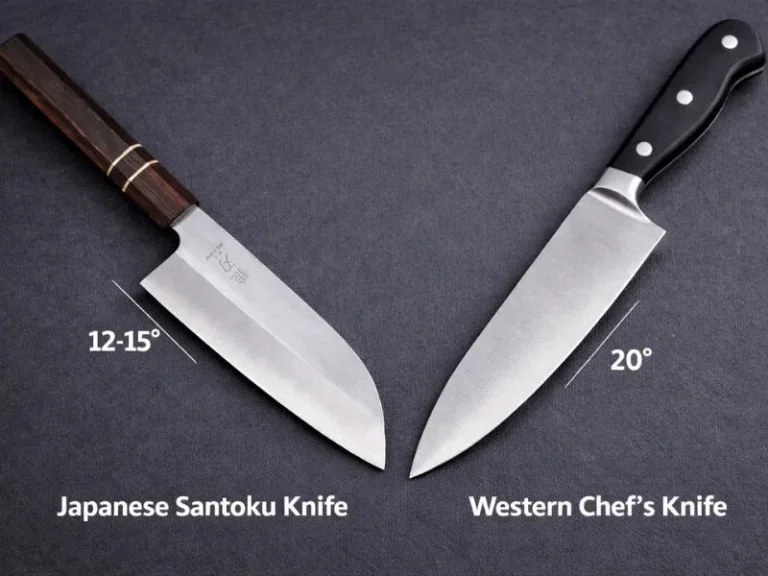
Even the best knife sharpener can fail if you're not using it correctly. The angle at which you hold the blade against the abrasive surface is the most critical factor. Most common kitchen knives, for example, are designed for an angle of around 15 to 20 degrees per side.
Sharpening at too steep or too shallow an angle won't form a proper cutting edge, or it might even damage the steel.
Finding and Maintaining the Angle
If you’re using a pull-through sharpener, the angle is often built-in, which is part of their appeal for beginners. However, for whetstones or manual sharpening systems, you need to be mindful. Many sharpening guides and jigs are available to help you maintain a consistent angle.
The key is repetition; practice holding the knife at that precise angle for every stroke. Consistency is far more important than the exact degree, within reason.
Pressure, Consistency, and Strokes
Applying the right amount of pressure is also vital. You need enough force to allow the abrasive material of the sharpener to grind away a tiny amount of steel, but too much pressure can deform the edge or overheat the metal. Aggregate user reviews often point to a firm, steady pressure as ideal.
Ensure you apply the same pressure on both sides of the blade. Similarly, aim for an equal number of strokes on each side. If you do five strokes on the left, do five on the right.
This helps create a balanced, symmetrical edge.
The Role of Lubrication
Many sharpening systems, especially whetstones, require lubrication. Water stones, for instance, need to be soaked or kept wet during use. Oil stones use a light honing oil.
Lubrication serves multiple purposes: it cools the blade and stone to prevent overheating, it helps flush away metal particles (swarf) and debris that can clog the abrasive, and it can make the sharpening process smoother. Skipping this step, particularly with water stones, can lead to the stone glazing over, reducing its effectiveness and potentially damaging the stone itself. Check your sharpener's specific requirements for lubrication.
When Your Sharpener Isn't Delivering: Troubleshooting
If you've performed the paper and tomato tests, felt for a burr, and inspected the edge, and the results still aren't up to par, it's time to troubleshoot. The problem might not be with the concept of sharpening, but with either your sharpener's condition or the state of the knife itself. Our editorial analysis of common user issues shows these are the two most frequent culprits.
Is the Sharpener Worn Out?
Sharpeners, like any tool with abrasive surfaces, wear down over time. For whetstones, the abrasive particles can become dull or clogged with metal particles and stone slurry. This is called "glazing." A glazed stone won't cut steel effectively, leading to a dull edge even after extensive sharpening.
Manufacturer documentation for abrasive sharpening tools often recommends periodic flattening of stones to expose fresh abrasive and cleaning them to remove swarf.
Pull-through sharpeners can also wear out. The carbide or ceramic inserts that form the sharpening slots can become dull or even break. If the slots look unusually shiny and smooth, or if you notice that the sharpener simply isn't creating a burr or improving sharpness anymore, the abrasive elements have likely worn down beyond their effective lifespan.
Is the Knife Edge Too Damaged?
Sometimes, a knife’s edge is so severely damaged that a standard sharpener struggles to restore it. Knives can develop chips, significant rolls in the edge, or even bends. A typical sharpening system is designed to refine an existing edge or restore a moderately dull one.
If your knife has a large nick or a severely bent tip, a simple sharpening session might not be enough.
In such cases, you might need a more aggressive sharpening method to first repair the damage before using your regular sharpener for refinement. This could involve starting with a much coarser grit whetstone, a diamond file, or a specialized repair system. For significant damage, professional sharpening might be the most efficient solution to bring the blade back to a repairable state.
Types of Sharpeners and What to Expect
The type of sharpener you're using significantly impacts how you'll assess its performance and what results you can expect. Each system has its own learning curve and set of indicators that signal it's working correctly. Our research shows that understanding these differences helps manage expectations and troubleshoot effectively.
Whetstone Performance
When using whetstones (water stones or oil stones), you'll typically feel the resistance of the steel being removed as you move the blade across the stone. The goal is to create a burr on the opposite side. A clean sharpening stroke on a properly prepared whetstone should feel smooth, with a slight grating sensation as metal is abraded.
You'll also notice swarf, a muddy mixture of water/oil and steel particles, forming on the stone’s surface. If you’re not seeing swarf, or if the stone feels slick and doesn’t seem to be cutting, it might be glazed or too dry. The resulting edge should pass the paper and tomato tests, and you should be able to feel a definite burr after sharpening one side.
Pull-Through and Electric Sharpeners
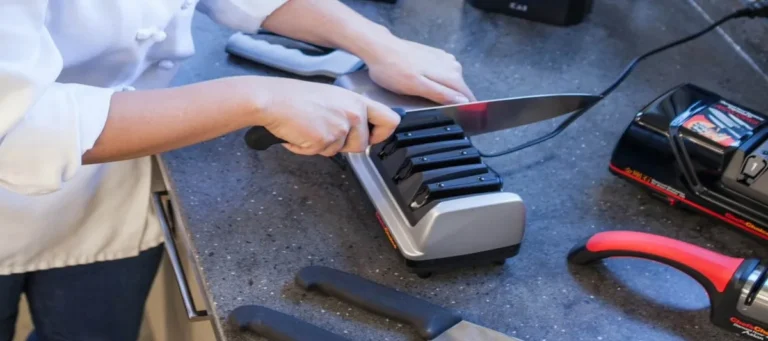
Pull-through sharpeners are designed for ease of use. As you draw the knife through the designated slots, you should feel a noticeable drag. This resistance comes from the carbide or ceramic abrasives cutting into the steel.
Some models may also include a honing stage, which will feel smoother. For electric sharpeners, the motor provides the abrasive action. You’ll hear the motor running and feel a slight resistance as you guide the knife through the sharpening guides.
The primary check for both these types remains the paper and tomato tests; if they fail, it suggests the abrasive elements might be worn, or the guides are not presenting the blade at the correct angle for effective sharpening. Aggregates of user feedback report that worn slots in pull-through sharpeners often lead to a lack of burr formation and poor edge retention.
Common Sharpening Mistakes to Avoid
Many users encounter issues because they're making common mistakes during the sharpening process. Understanding these pitfalls can save you frustration and help you achieve a truly sharp edge. The most frequent errors involve inconsistent technique and improper maintenance of both the knife and the sharpener itself.
Incorrect Angle Application
As mentioned, maintaining the correct sharpening angle is paramount. If you're using a manual system like whetstones, a common mistake is letting the angle waver during strokes. This can lead to an uneven edge that's more prone to damage and dulls quickly.
Similarly, users might press too hard or too lightly, failing to effectively abrade the steel or, conversely, damaging the edge.
Neglecting the Burr
Another frequent error is not creating or properly removing the burr. If you stop sharpening before a burr forms, you haven't effectively sharpened one side of the edge. Conversely, if you're still seeing a large, rough burr after your sharpening passes, it means you likely haven't transitioned to refining the edge properly, or you're using too much force.
A fine burr that’s easily removed during the finishing or honing stage is the goal.
Maintenance Oversights
Failing to clean your sharpener is also a major issue. Abrasive stones clogged with metal particles and slurry won't cut efficiently, leading to glazing. Pull-through sharpeners can accumulate debris in their slots, hindering performance.
Likewise, not cleaning knives after sharpening can leave microscopic steel particles that can interfere with edge formation and retention.
Sharpening Systems: A Quick Comparison
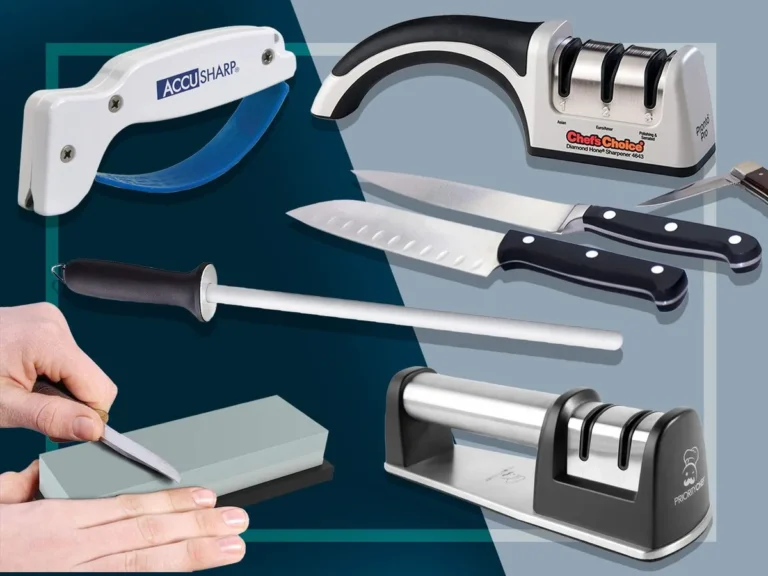
Choosing the right sharpening system depends on your needs, skill level, and the types of knives you own. Each category offers different benefits and drawbacks. Our research indicates that while all can produce sharp edges, they vary significantly in ease of use, control, and effectiveness for different tasks.
Whetstones (Water/Oil Stones)
These are traditional sharpening tools that offer the highest degree of control. They consist of abrasive particles bonded together in a stone.
- Pros: Excellent control over angle and pressure, capable of achieving very fine and durable edges, versatile for different knife types.
- Cons: Steep learning curve to master proper technique, requires maintenance (flattening, soaking), can be time-consuming.
- Best for: Enthusiasts, chefs, and users who want precise control and are willing to invest time in learning.
Pull-Through Sharpeners
These are simple, guided systems where you draw the knife through pre-set angled slots.
- Pros: Very easy to use, quick, consistent angle most of the time.
- Cons: Limited control over angle and pressure, can be aggressive and remove too much metal, may not be suitable for all knife types or sizes.
- Best for: Beginners, busy individuals who need quick touch-ups, and those who prioritize speed and simplicity.
Electric Sharpeners
Motorized units that automatically guide the blade through abrasive stages.
- Pros: Very fast, generally easy to use, can restore sharpness quickly.
- Cons: Can be overly aggressive and remove significant metal, less control over the sharpening process, may not be ideal for high-end or specialized knives.
- Best for: Those who need to sharpen many knives quickly, users prioritizing speed and convenience above all else.
When is a Knife Sharpener Right for You?
Deciding whether a sharpener is a worthwhile tool for you really comes down to your relationship with your knives and your cooking habits. If your knives are constantly struggling to slice through simple ingredients, or if you find yourself exerting excessive force, then a sharpener is definitely something to consider. It’s not just about convenience; it’s about safety and performance in the kitchen.
- For the Home Cook: If you find yourself getting frustrated by dull knives while prepping meals, a sharpener can transform your cooking experience. It makes slicing vegetables, carving meats, and even spreading butter easier and more enjoyable.
- For the Enthusiast: If you own high-quality knives, you know they perform best when sharp. A good sharpener helps you maintain those premium edges, protecting your investment and ensuring optimal performance.
- For the Busy Professional: Even if you have knives sharpened professionally, a sharpener can be invaluable for quick touch-ups between sessions, keeping your tools in top condition day-to-day.
Expert Tips for Maintaining Sharpness
Beyond just sharpening, a few practices can significantly extend the life of your knife's edge and ensure your sharpener’s effectiveness. These tips focus on daily care and smart usage. Aggregate user feedback suggests these practices greatly improve long-term results.
- Hone Regularly: Use a honing steel or rod before or after each significant use. This realigns the microscopic edge, keeping it sharper for longer between actual sharpening sessions.
- Use the Right Cutting Surface: Avoid sharpening or cutting on hard surfaces like glass, stone, or metal. These will dull your knife edge quickly and can even damage it. Wood or high-quality plastic cutting boards are ideal.
- Clean Knives Promptly: Wash knives by hand after each use with soap and water, and dry them immediately. Dishwashers can dull edges, damage handles, and are generally bad for knife longevity.
- Store Knives Safely: Keep knives in a knife block, magnetic strip, or blade guards. This protects the edge from accidental impacts and keeps users safe.
Frequently Asked Questions About Sharpener Performance
How do I know if I'm using the right sharpening angle?
Most kitchen knives perform best between 15 and 20 degrees per side. If your sharpener has built-in guides, use those. For manual sharpening, practice holding the blade at a consistent angle, perhaps using a guide tool or placing coins under the spine to find a starting point, and then checking if you can consistently reproduce that angle.
A consistent angle is more important than the exact degree for many users.
Can a sharpener be too aggressive?
Yes, some sharpeners, particularly those with very coarse carbide blades, can remove metal too quickly. This can lead to a weaker edge or premature dulling, and it’s also harder to control precisely. Aggressive sharpening can also remove too much material, shortening the lifespan of your knives.
It’s generally better to use a finer abrasive for a keener, more durable edge.
How often should I sharpen my knives?
This depends heavily on usage. For home cooks, sharpening every few weeks to a couple of months is common. Professional chefs might sharpen daily or even multiple times a day for high-volume work.
The best indicator is your knife's performance: if it fails the paper test or struggles with basic tasks, it's time to sharpen. Regular honing with a steel can extend the time between full sharpenings.
What's the difference between sharpening and honing?
Sharpening actually removes metal to create a new, sharp edge. Honing, on the other hand, typically realigns a slightly bent or rolled existing edge. A honing steel or rod is used for maintenance between sharpenings and doesn't significantly remove metal.
While both contribute to a knife's cutting ability, only sharpening truly restores a dull edge.