How Long Does It Take to Sharpen a Knife?
The time it takes to sharpen a knife isn't a fixed number; it's a variable equation. Think of it as a project with several key elements that can speed it up or slow it down considerably. Understanding these factors is crucial to setting realistic expectations for yourself.
Our research indicates that most home cooks can achieve a functional, sharp edge within 5 to 15 minutes using common whetstone methods. For professional chefs or those aiming for extreme sharpness, the timeline can extend significantly, often involving more precise techniques and multiple grit stages as outlined by various culinary equipment standards bodies.
Quick Answer
Sharpening a knife typically takes between 1 minute and 30 minutes. A quick touch-up with a honing steel might only take 1-2 minutes. Basic sharpening with whetstones for a home cook averages 5-15 minutes per knife.
Restorative sharpening for very dull or damaged blades can take 20-30 minutes or more.
What Makes Sharpening Time Vary So Much?
The speed at which you can get a knife back to a keen edge hinges on a blend of factors, from the steel it’s made of to the tools you use and your own comfort level.
- The Knife Itself: This is a big one.
- Steel Hardness: Knives made from harder steels, often found in higher-end chef's knives, hold an edge longer but can take more effort to grind and hone. Manufacturer specifications often list Rockwell hardness, with steels above 58 HRC typically considered harder.
- Edge Condition: A knife that’s slightly dull will sharpen much faster than one that has been neglected for months and has a visibly rounded or even chipped edge. Bringing a severely damaged blade back to life is a longer process.
- Your Sharpening Method: The tool you choose makes a huge difference. Are you using a simple pull-through sharpener? A honing steel? A progression of whetstones? Or a powered electric sharpener? Each has its own learning curve and inherent speed.
- Your Skill and Experience: The first few times you sharpen a knife, especially with whetstones, expect it to take longer. You're learning to find the correct angle, control your pressure, and execute smooth strokes. As your muscle memory develops, your speed will naturally increase.
- Desired Sharpness Level: Are you aiming for a functional edge that slices vegetables cleanly, or are you striving for that ultra-fine, paper-slicing sharpness? The latter requires more refinement and takes considerably more time.
These variables combine to create a wide spectrum of possible sharpening times, from a minute for a quick hone to half an hour or more for a full restoration.
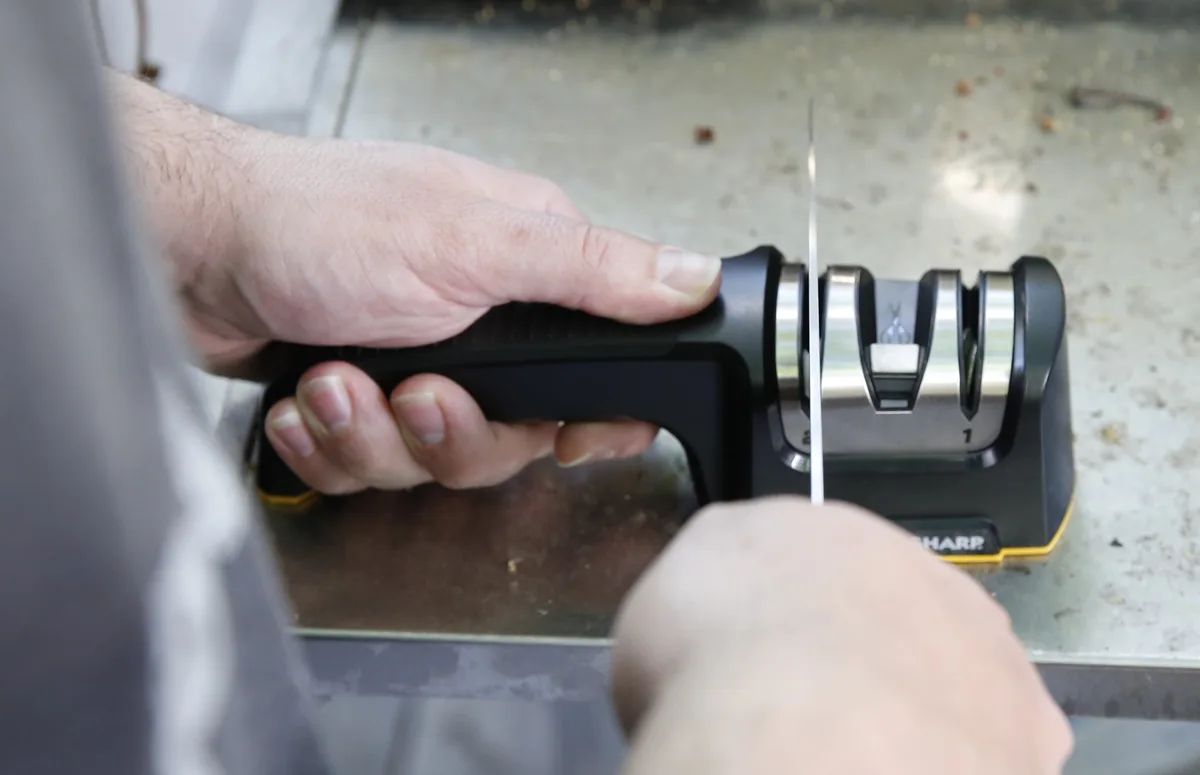
Image source: Bing (Web (fair-use with source credit))
Quick Sharpening: Pull-Through Tools and Honing Steels
When you're in a pinch and just need your knife to cut a little better, a few quick methods can help. These are generally faster but often don't achieve the same level of sharpness or longevity as more involved techniques.
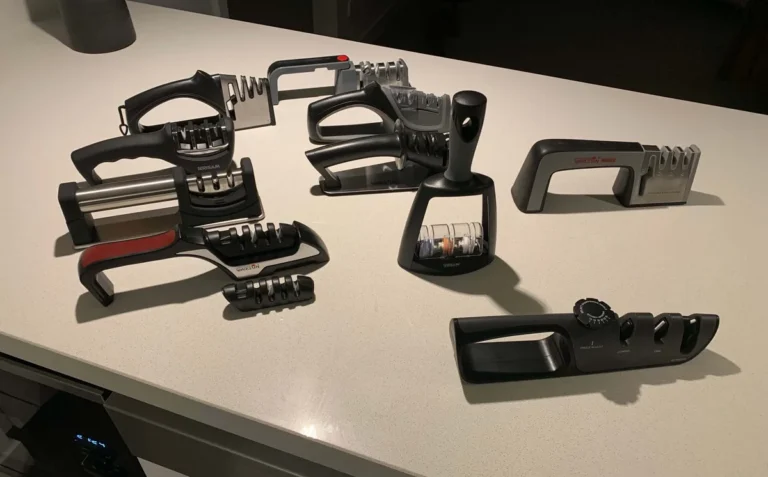
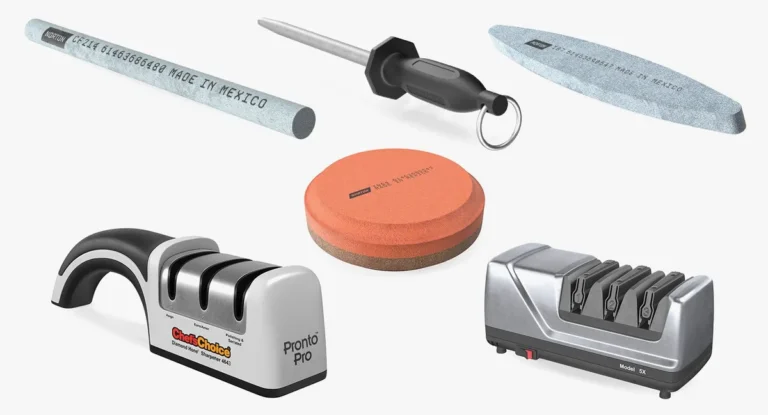
- Pull-Through Knife Sharpeners: These are the simplest tools, often featuring slots with carbide or ceramic abrasives. You simply draw the knife blade through the slots a few times.
- Time: Expect this to take about 30 seconds to 1 minute per knife.
- Outcome: This method is more about abrading the edge to remove minor dullness and realign it. It's fast and easy, but it tends to remove more metal than necessary and can create a less refined, less durable edge. It’s good for a quick fix but not ideal for maintaining your best knives.
- Sharpening Steels (Honing Steels): These are long rods, typically made of steel, ceramic, or diamond-coated material. Their primary job is honing, which means realigning the microscopic teeth on the blade's edge that get bent out of shape during normal use. They don't remove significant amounts of metal like sharpening stones do.
- Time: A quick honing session usually takes 1 to 2 minutes.
- Outcome: This is essential for daily maintenance, keeping your knives sharp between actual sharpening sessions. It makes a noticeable difference in how the knife feels and cuts, but it won't sharpen a truly dull blade. It's a maintenance task, not a restoration.
These quick methods are best for users who want a fast improvement or need to maintain an already decent edge. They are a foundational part of knife care, but they don't replace the need for proper sharpening periodically.
The Whetstone Process: Deeper Sharpening Timelines
When we talk about truly sharpening a knife, getting a fresh, keen edge that lasts, whetstones are the gold standard for many. This process takes longer but offers far superior results. The time involved here can be broken down by the grit progression and the user's familiarity with the technique.
Whetstones, also known as sharpening stones or water stones, come in various grit levels. The grit number indicates how coarse the stone is; lower numbers (like 200-1000) are coarser and remove metal faster, while higher numbers (like 3000-8000+) are finer and refine the edge to a polished state.
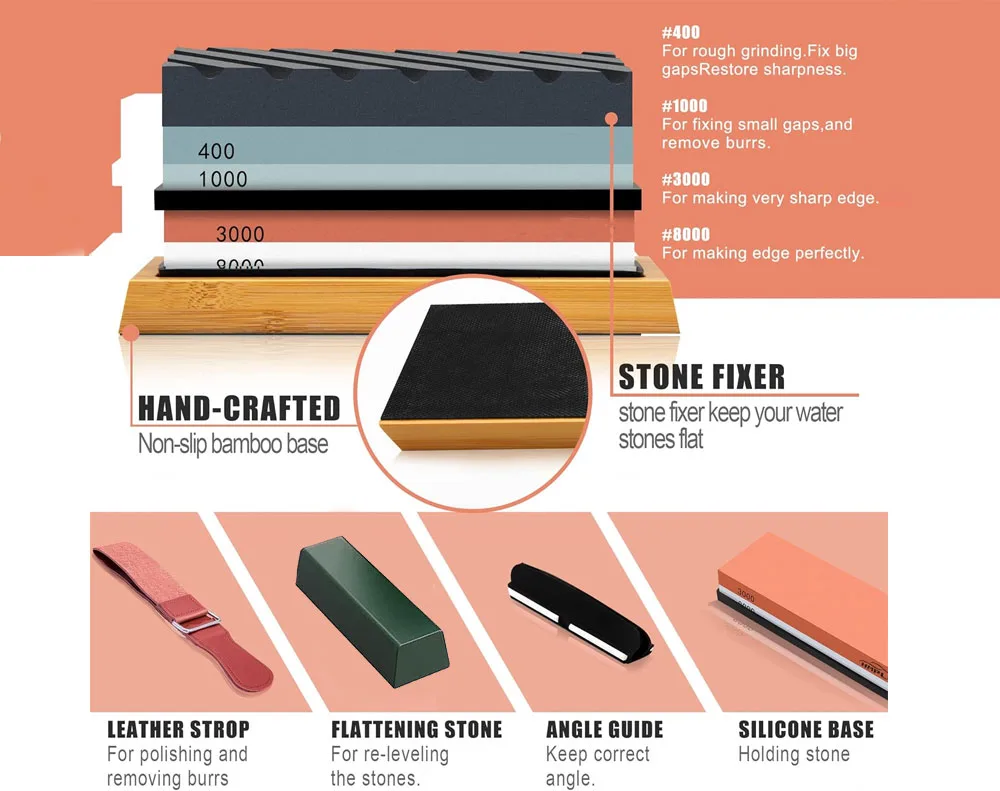
Image source: Bing (Web (fair-use with source credit))
Grit Matters: How Stone Coarseness Affects Time
The grit progression you use directly impacts the total sharpening time. A common setup for home cooks might involve two stones: a medium grit (around 1000) for establishing the primary edge and a fine grit (around 3000-6000) for refining it.
- Using a Single Medium Stone (e.g., 1000 Grit): If your goal is a functional, sharp edge and you're using a single, medium-grit stone, you might complete the sharpening in 5 to 10 minutes. This is often sufficient for many everyday kitchen tasks.
- Using a Two-Stone Progression (e.g., 1000 Grit + 3000 Grit): For a noticeably sharper and more refined edge, progressing through two stones adds time. You’ll spend time on the 1000 grit, then switch to the 3000 grit for further refinement. This typically takes 10 to 15 minutes.
- Using a Multi-Stone Progression (e.g., 400/1000 Grit + 3000/6000 Grit): If you’re dealing with a duller blade or aiming for a truly exceptional edge, using a coarser stone (400 grit) to set the bevel, followed by 1000, 3000, and potentially 6000 grit stones, will extend the time. This process could easily take 20 to 30 minutes or even longer per knife.
Each stone requires a period of consistent sharpening to effectively abrade the steel. The more stones you use, and the finer they get, the more time you invest in polishing and refining the edge.
Developing Your Sharpening Skill
Beyond the tools and materials, your personal proficiency plays a significant role in how long sharpening takes. When you're starting out with whetstones, you're learning to:
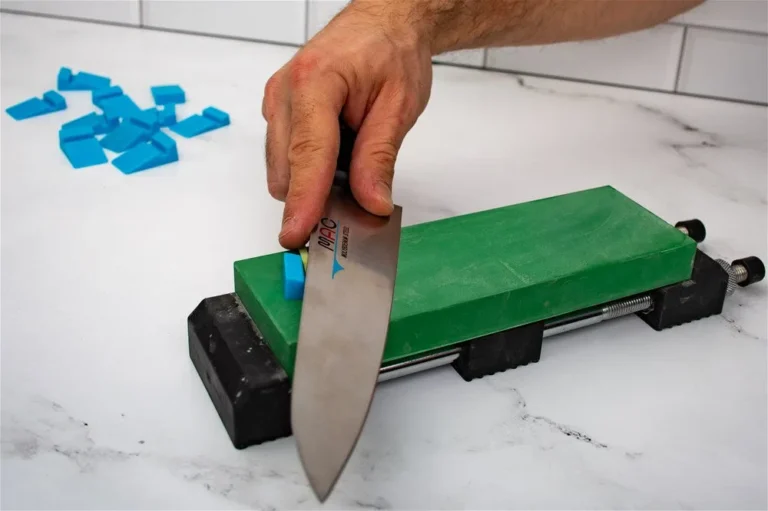
- Maintain a Consistent Angle: Finding and holding that perfect angle (often 15-20 degrees per side for kitchen knives) is challenging initially. You might stop to check it frequently.
- Control Pressure and Strokes: Learning how much pressure to apply and how to make smooth, consistent strokes across the entire length of the blade takes practice.
- Identify and Remove the Bur: A key part of sharpening is creating a "burr", a tiny flap of metal on the opposite side of the edge being worked, and then removing it. This process itself takes time and careful attention.
- Deburr and Refine: After establishing the edge, you need to deburr it, often by alternating strokes on the stone or using a fine ceramic rod. This final step polishes the edge and removes any remaining imperfections.
Initially, you might spend much of your time just trying to get the technique right. As you gain experience, your movements become more fluid and efficient. Aggregate user reviews report that a seasoned sharpener can often achieve an excellent edge with whetstones in around 10-15 minutes, whereas a beginner might spend twice that.
What Kind of Sharpness Are You Aiming For?
The desired level of sharpness is a major factor in how long sharpening takes. It’s not just about making a knife cut; it’s about how well it cuts and how long that sharpness lasts. Different tasks require different levels of edge keenness.
- Functional Sharpness: This is the most common goal for home cooks. The knife should slice through ingredients like onions, tomatoes, and meats cleanly without crushing or tearing. It should feel safe and easy to use.
- Time: This can often be achieved within 5 to 15 minutes using medium to fine grit whetstones.
- Razor Sharpness: This is the level where the knife can effortlessly slice through paper, glide through soft tomatoes without the skin breaking, or even shave hair. This requires meticulous attention to detail, finer grit stones, and additional polishing steps.
- Time: Reaching this level typically requires 20 to 30 minutes or more, involving multiple grit stages and careful deburring.
- Surgical Sharpness: This is an extreme level, usually reserved for specialized knives or by professionals who need the absolute finest edge possible. It involves very fine grit stones, stropping on leather with abrasive compounds, and exceptional skill.
- Time: This can take 30 minutes to an hour or longer and is often beyond what most home users need or can easily achieve.
Most manufacturer guidelines for knife maintenance suggest aiming for functional sharpness for everyday use. Achieving extreme sharpness requires a commitment to the process and the right tools. The time invested directly correlates with the quality and longevity of the edge you create.
Common Sharpening Mistakes That Add Time
Rushing the sharpening process or not knowing the proper techniques can actually make the job take longer in the long run, or worse, damage your knife. These common errors often lead to inefficient work and require more time to correct.
- Incorrect Angle: Not maintaining a consistent and appropriate angle is perhaps the most common mistake. If your angle is too steep or too shallow, you won't effectively abrade the edge. You’ll end up spending more time trying to fix the angle or re-sharpening later because the edge isn't keen. For most kitchen knives, an angle between 15-20 degrees per side is standard, as recommended by many cutlery associations.
- Too Much Pressure: Applying excessive force when sharpening, especially with whetstones, can actually damage the edge you’re trying to create. It can cause the steel to bend or even chip, leading to more work to repair the damage. It also wears down your stones faster.
- Not Using Enough of the Stone: Sharpening by only touching a small part of the blade to the stone means you're not effectively reshaping the entire edge. You need to move the knife across the stone’s surface to ensure an even grind. This inefficiency adds to the overall time.
- Skipping Grits or Steps: Trying to jump from a coarse stone to a fine one without using intermediate grits can leave scratches on the edge and prevent it from getting truly sharp. Similarly, skipping the deburring step means you’ll have a weaker, less stable edge.
- Not Lubricating Whetstones: For water stones, using insufficient water means the stone clogs up with metal particles, reducing its effectiveness and making it slower. You need a good slurry to help the stone cut properly.
- Focusing Only on One Side: Both sides of the blade need equal attention to create a symmetrical and durable edge. Uneven sharpening will result in a weaker, less efficient blade.
These mistakes often lead to frustration and can turn a relatively quick sharpening session into a drawn-out, problematic task. Learning the correct techniques and being patient are key to efficient and effective knife sharpening.
Real-World Sharpening Examples
To give you a better grasp on how long sharpening actually takes, let's look at a few typical scenarios that reflect common user experiences. These aren't extreme cases, but rather typical situations you might encounter in a home kitchen.
Scenario 1: Quick Kitchen Touch-Up
- The Knife: A well-loved chef's knife, perhaps 8 inches long, used daily for about a month since its last proper sharpening. It’s still usable, but you notice it’s not slicing through tomatoes as cleanly as it used to.
- The Tool: A medium-grit whetstone (around 1000 grit) and a fine-grit whetstone (around 3000 grit).
- The Process: You soak the water stones, set up your stable surface, and begin sharpening at a consistent 17-degree angle. You focus on making smooth strokes, ensuring you cover the entire length of the blade on each side with the 1000 grit stone. After about 4-5 minutes, you switch to the 3000 grit stone for another 4-5 minutes to refine the edge. You then perform a few alternating light strokes to remove the burr.
- The Time: This entire process takes approximately 10 to 12 minutes.
- The Result: A noticeably sharper knife that glides through produce with ease, ready for another period of regular use.
Scenario 2: Regular Maintenance Sharpening
- The Knife: A paring knife that’s been used for various small tasks over a few weeks. It’s still reasonably sharp, but you want to keep it in top condition.
- The Tool: A single, medium-grit whetstone (around 1000 grit).
- The Process: You quickly prepare the stone with water. You focus on maintaining your learned angle, making about 10-15 strokes per side on the stone. You check for a burr, and if one is present, you do a few more alternating strokes to remove it.
- The Time: This quick maintenance session takes about 5 to 7 minutes.
- The Result: The knife feels much sharper, regaining its precision for intricate tasks like peeling or de-veining shrimp. This is a good routine for users who want to avoid their knives becoming truly dull.
Scenario 3: Bringing Back a Neglected Knife
- The Knife: A utility knife that’s been sitting in the drawer for months. It’s quite dull, requiring significant force to cut through paper.
- The Tool: A coarse-grit whetstone (around 400 grit), a medium-grit whetstone (1000 grit), and a fine-grit whetstone (3000 grit).
- The Process: You start with the 400 grit stone to establish a fresh edge, taking your time to ensure the angle is correct and working through all sections of the blade. This might involve 10-15 minutes on this stone alone, focusing on removing the old, rounded edge. Then, you move to the 1000 grit stone for another 7-10 minutes to refine the edge left by the coarse stone. Finally, you spend about 5-7 minutes on the 3000 grit stone to polish and hone the edge. Deburring might take an extra couple of minutes.
- The Time: This thorough restoration process takes approximately 25 to 35 minutes.
- The Result: The knife is reborn with a significantly sharper, more durable edge, ready for regular use and easier to maintain going forward.
Expert Tips for Faster, Better Sharpening
Getting a great edge doesn't always mean spending hours. With the right approach and a few key tips, you can make your sharpening sessions more efficient and achieve better results faster.
- Consistent Angle is King: Practice finding and holding your chosen angle. Many users find using a sharpening guide clip or practicing with just water initially helps build muscle memory. A consistent angle means you’re grinding the edge evenly, which is faster and more effective.
- Know Your Stones: Understand the grit numbers and what they’re for. A coarse stone (under 1000 grit) is for repairing damage, medium (1000-3000) is for general sharpening, and fine (3000+) is for polishing and refining. Using the right stone for the job saves time.
- Develop a Smooth Rhythm: Once you've found your angle, focus on smooth, consistent strokes. Think of it as a fluid motion across the stone, not a jerky, hesitant movement. This efficiency comes with practice.
- Listen and Feel: As you sharpen, pay attention to the sound and feel. A smooth, consistent grind usually indicates you're doing it right. If it feels scratchy or uneven, check your angle and pressure.
- Don't Neglect Honing: Regularly use a honing steel or ceramic rod between sharpenings. This realigns the edge and can keep your knife sharp for much longer, reducing the frequency of full sharpening sessions. A quick 1-2 minute hone can save you 10 minutes of sharpening later.
- Maintain Your Stones: Keep your whetstones clean and flat. A dirty stone cuts slower. Flattening your stones with a flattening stone or silicon carbide grit ensures they make even contact with the blade, leading to more efficient sharpening.
By focusing on consistency, understanding your tools, and practicing regularly, you can significantly reduce the time it takes to achieve a sharp edge while improving the quality of that edge.
Frequently Asked Questions About Sharpening Time
How long does it take to sharpen a knife with a pull-through sharpener?
It typically takes about 30 seconds to 1 minute to sharpen a knife using a pull-through sharpener. This method is fast but is more for quick edge maintenance than deep sharpening.
Is it faster to sharpen a knife with a steel or a whetstone?
It is much faster to use a sharpening steel for honing, usually taking 1-2 minutes. A whetstone requires more time, typically 5-15 minutes for a good edge, as it actually reshapes and sharpens the blade metal.
Can a dull knife be sharpened quickly?
While a quick touch-up is possible, a truly dull knife requires more time to properly reshape the edge. Trying to rush the process on a very dull blade can lead to poor results or damage. Expect at least 10-15 minutes for a dull knife with a basic whetstone.
Does the type of steel affect how long it takes to sharpen a knife?
Yes, the type of steel significantly impacts sharpening time. Harder steels (e.g., over 58 HRC) hold an edge longer but can take more effort and time to grind down compared to softer steels.
How long does it take a beginner to sharpen a knife with whetstones?
A beginner might take 15-30 minutes per knife when first learning to use whetstones. This is due to the learning curve in maintaining the correct angle, controlling pressure, and executing smooth strokes. With practice, this time can be reduced to under 15 minutes.