How to Sharpen a Knife?
When your knife feels like it's pushing food around the cutting board instead of slicing through it, it's time for some attention. Learning how to sharpen a knife is a fundamental skill that makes cooking safer, easier, and more enjoyable. A properly sharpened blade is predictable and requires less force, which means fewer slips and more precise cuts.
Our research indicates that a knife edge, typically a single bevel ground to a specific angle, can dull from use, rolling over or accumulating microscopic chips. Per manufacturer specifications for common kitchen knives, a common edge angle is around 20 degrees per side. This guide will walk you through understanding your options and mastering the techniques to bring your blades back to razor-sharpness.
Quick Answer
Sharpen a knife by realigning or grinding its edge to a fine point. Use a honing steel for regular maintenance or a whetstone/electric sharpener for true edge creation. Maintain a consistent angle, typically 15-20 degrees, for optimal sharpness and safety.

Image source: Web (Bing) / mewarnai.net (Web image (fair-use with source credit))
Why Your Knife Feels Like a Butter Knife (And How to Fix It)
It's frustrating, right? You pull out your favorite chef's knife, ready to tackle dinner prep, and it just… won't… cut. It’s like wrestling with your ingredients instead of gracefully slicing through them.
This isn't just a minor inconvenience; it's a real safety hazard and a major time drain in the kitchen. A dull knife is more prone to slipping off produce, potentially leading to cuts. Plus, you end up mashing delicate items like tomatoes or herbs instead of getting clean cuts.
Our editorial analysis of common kitchen tool complaints shows that dull knives are consistently ranked among the top frustrations for home cooks. The good news? This is entirely preventable and fixable.
Bringing a dull blade back to its prime involves understanding how the edge works and choosing the right tool and technique to restore it. It's a skill that pays dividends every time you step up to the cutting board.
Understanding the Knife Edge: What's Really Happening
At its core, a knife's sharpness comes down to its edge. Think of it as a microscopic V-shape ground into the very end of the metal blade. This V-shape, when incredibly fine and properly aligned, is what allows the knife to slice through food with minimal pressure.
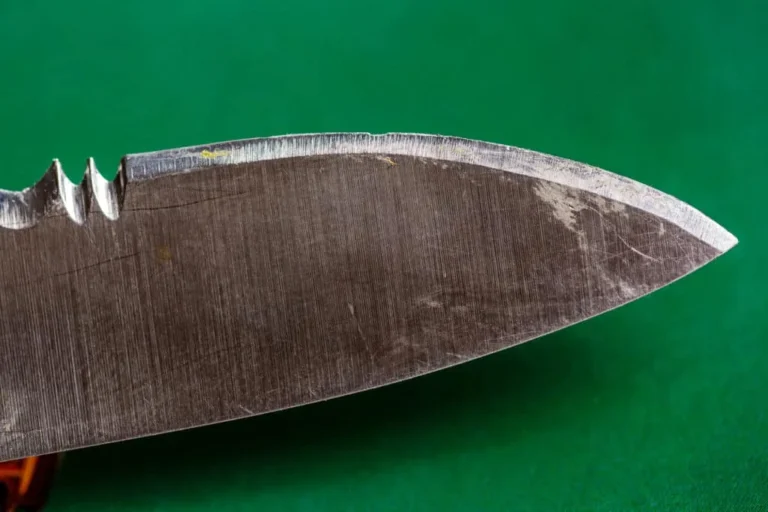
Over time, as you use your knife, this delicate edge is subjected to stress. It can roll over, meaning the tiny point gets bent slightly to one side. It can also develop microscopic chips or burrs, where tiny pieces of the metal break off.
This damage is what makes the knife feel dull and less effective.
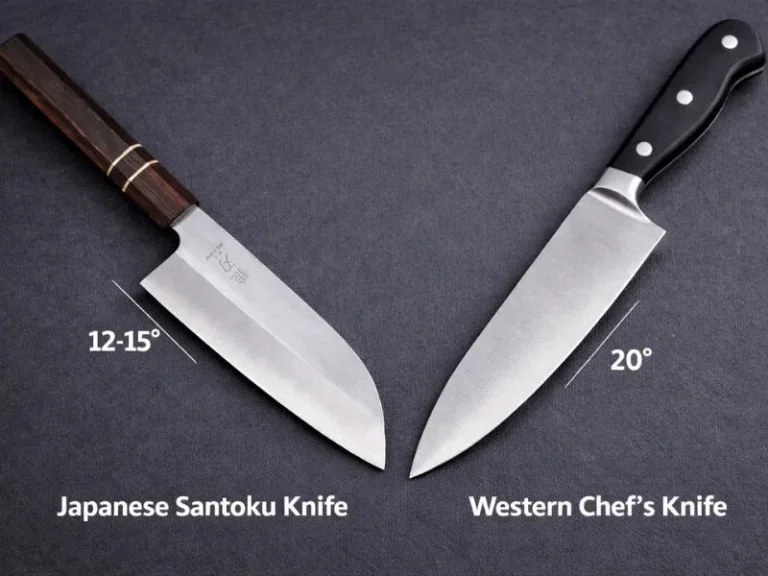
Manufacturer specifications for high-quality kitchen knives often detail the intended edge angle, typically ranging from 15 to 20 degrees per side for Western-style knives, and sometimes even sharper (10-15 degrees) for Japanese knives. When this edge gets compromised, the knife loses its ability to slice cleanly. The process of sharpening aims to either realign this damaged edge or grind away the dull metal to create a fresh, sharp one.
Your Sharpening Toolkit: Steel, Stones, and Machines
When you decide to tackle a dull knife, you've got a few primary tools at your disposal. Each has its own strengths and is suited for different levels of dullness and user preference. Understanding these tools is the first step to effective knife care.
Honing vs. Sharpening: Knowing the Difference
It's common to mix these two up, but they do different jobs.
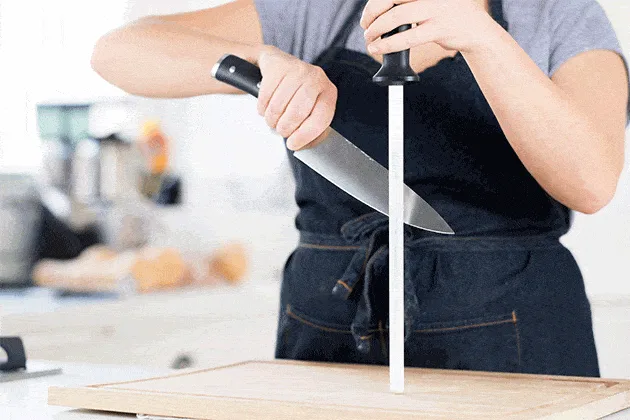
- Honing: This is about maintenance. It realigns the microscopic edge of the blade that has bent over through normal use. Think of it like straightening a bent piece of wire. It makes a sharp knife feel sharp again, but it doesn't remove metal or create a new edge. You should hone your knives regularly, perhaps before or after each use. A common tool for this is a sharpening steel or honing rod, often made of steel, ceramic, or diamond-coated material.
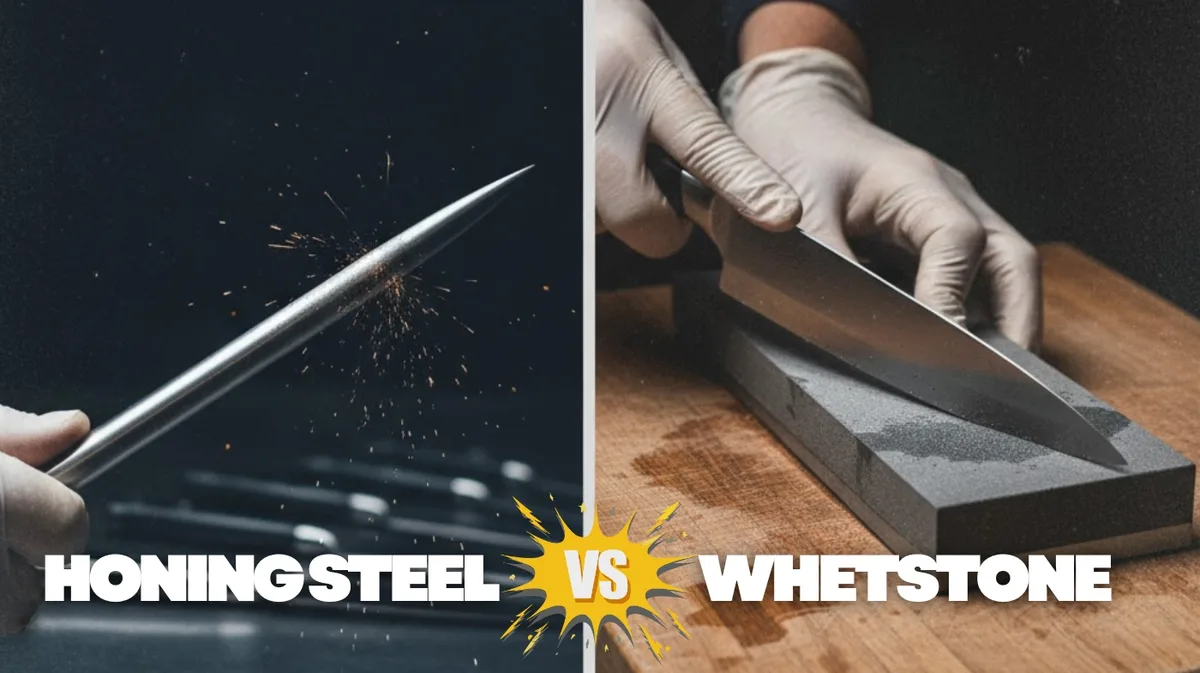
Image source: Bing (Web (fair-use with source credit))
- Sharpening: This is about restoration. It actually removes metal from the blade to create a brand-new, sharp edge. This is what you do when honing isn't enough and your knife is truly dull. Tools for this include whetstones (also called sharpening stones), electric knife sharpeners, and manual pull-through sharpeners.
Sharpening Stones: The Art of the Whetstone
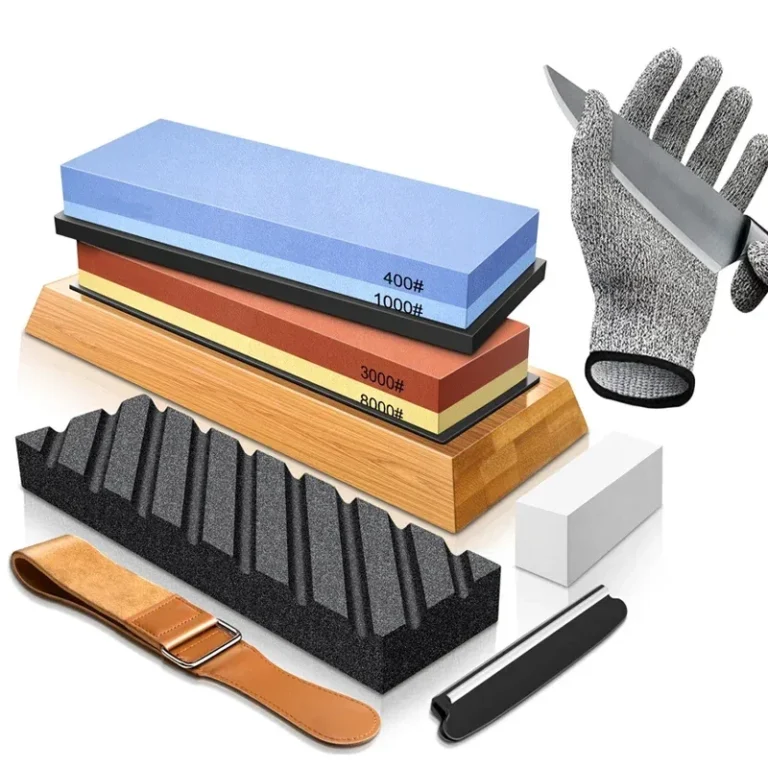
Whetstones, or sharpening stones, are the traditional and arguably most effective method for achieving a superior edge. They are abrasive blocks that you use to grind down the metal of your knife's edge. They come in various grits, which indicate how coarse or fine the abrasive particles are.
- Coarse grit stones (low numbers, like 200-600) are for repairing badly damaged or very dull knives.
- Medium grit stones (around 1000) are good for general sharpening and restoring a decent edge.
- Fine grit stones (3000-6000+) are used to refine and polish the edge, making it incredibly sharp and smooth.
Many whetstones are water stones, meaning they are soaked in water before use, which creates a slurry that aids in the sharpening process. Others are oil stones, which require oil instead of water. The key to using whetstones is maintaining a consistent angle as you move the blade across the stone.
This method offers the most control but requires the most practice.
Electric & Manual Sharpeners: The Quick Fixes
For those who want speed and simplicity, electric and manual sharpeners are popular choices.
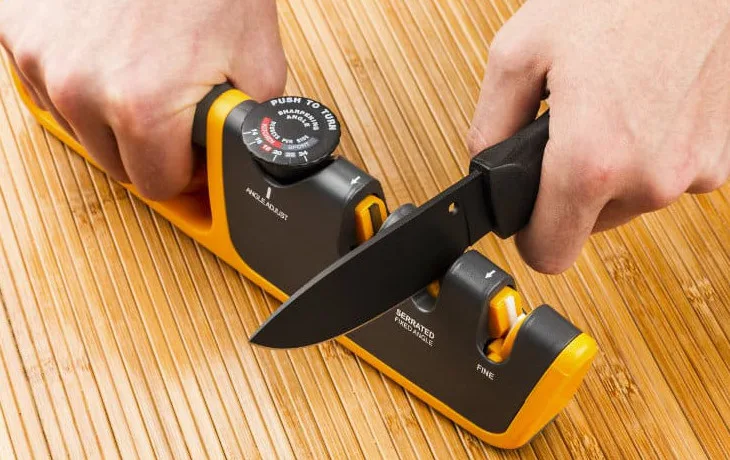
Electric knife sharpeners typically have pre-set angled slots. You simply pull the knife through these slots, and motorized abrasive wheels do the work of grinding the edge. They are very user-friendly and can bring a dull knife back to life quickly. However, you have less control over the angle, and some models can remove more metal than necessary if not used carefully.
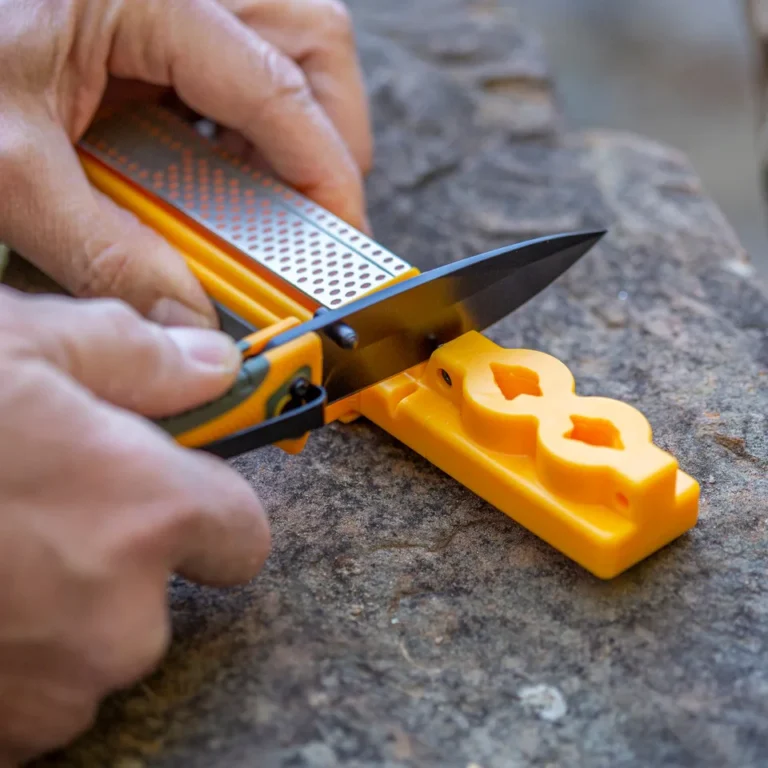
Manual pull-through sharpeners are simpler, often handheld devices with V-shaped slots lined with abrasive materials. You manually pull the knife through these slots. They are inexpensive and portable but generally less effective for severely dull knives compared to whetstones or good electric models.
The Core Skill: Mastering the Sharpening Angle
If there's one single factor that separates a great knife edge from a mediocre one, it's the sharpening angle. This refers to the precise angle at which the blade meets the sharpening surface. Getting this consistent is more important than almost anything else.
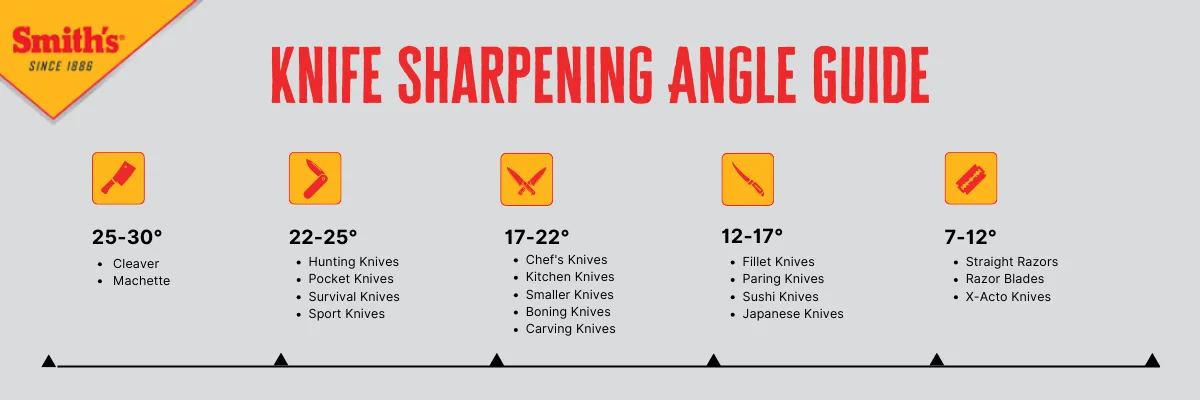
Image source: Bing (Web (fair-use with source credit))
For most Western-style kitchen knives, the ideal angle is typically between 15 to 20 degrees per side. This range provides a good balance of sharpness and durability. Japanese knives, known for their incredible sharpness, often feature a narrower angle, sometimes as low as 10 to 15 degrees per side.
A wider angle (e.g., 25 degrees) results in a more durable but less acutely sharp edge.
The challenge with manual sharpening methods like whetstones is holding that angle perfectly consistent throughout the entire stroke, from the heel of the blade to the tip. Any deviation means you're grinding at an inconsistent angle, which can lead to a weak or uneven edge. This is why many beginners find electric sharpeners appealing, as they provide a fixed angle, though not always the ideal one for every knife.
Finding Your Angle: A Visual Guide
Visualizing the correct angle can be tricky without hands-on demonstration, but we can describe it. Imagine your knife lying flat on the sharpening stone. That's 0 degrees.
Now, lift the spine of the knife away from the stone.
- For a 20-degree angle: If you picture the blade's width as a reference, lifting the spine so the spine is about one-quarter of the blade's width off the stone generally approximates 20 degrees.
- For a 15-degree angle: You would lift the spine even less, perhaps only about one-fifth of the blade's width off the stone.
The goal isn't to measure it perfectly with a protractor every time. It's about developing a feel for that angle and maintaining it. Many sharpening guides suggest using a marker to color the edge bevel; if you're sharpening correctly, you'll be removing the marker evenly from the bevel.
Step-by-Step: Bringing Your Knife Back to Life with Whetstones
Using whetstones is a rewarding process that yields exceptional results, but it demands patience and attention to detail. This step-by-step guide focuses on using a dual-grit water stone, a common starting point for many enthusiasts. Always refer to your knife manufacturer's specific recommendations if available, especially regarding edge angle.
Preparing Your Stone
Most water stones need to be soaked before use. Submerge the stone in water until the air bubbles stop rising, usually for 5-15 minutes depending on the stone's density. This saturates the porous material and creates a lubricating slurry as you sharpen.
Place the soaked stone on a non-slip surface, like a damp cloth or a dedicated stone holder, to prevent it from moving during sharpening. Use the coarser grit side first if your knife is dull or has minor damage.
The Sharpening Stroke: Left Side
Place your knife on the stone with the heel of the blade (the part closest to the handle) positioned on the stone. Angle the blade so the edge is facing away from you, and lift the spine to achieve your desired angle (e.g., 15-20 degrees). Some people find it easier to maintain the angle by resting their index finger gently on the spine of the blade.
Begin to draw the knife towards you in a smooth, slicing motion, applying light, even pressure. Imagine you are trying to shave a thin layer off the stone itself. Ensure the entire length of the edge makes contact with the stone.
After a few strokes (5-10), lift the knife and move it to the tip, repositioning it to ensure the entire blade from heel to tip has been sharpened. Repeat this on the other side of the stone for the same number of strokes.
The Sharpening Stroke: Right Side
Now, flip the knife over so the opposite side of the blade is facing up. Re-establish your chosen sharpening angle. It's crucial to try and match the angle you used on the first side as closely as possible.
Again, begin drawing the knife towards you, applying consistent pressure and ensuring the entire length of the edge makes contact with the stone. Execute the same number of strokes as you did on the first side to maintain balance and an even edge. This mirroring of strokes helps ensure both sides of the blade are sharpened symmetrically, which is key for a well-balanced and effective edge.
Refining the Edge: Moving to Finer Grits
Once you've completed several passes on the coarser grit side and feel a slight burr (a tiny wire edge) forming along the opposite side of the blade, it's time to move to the finer grit side of your stone. Repeat the entire process: soak the stone if necessary, place it securely, and use the same angle and motion. This finer grit refines the edge, removing the microscopic burrs left by the coarser stone and creating a smoother, sharper, and more polished cutting surface.
For an even more refined edge, some users employ a leather strop after the finest grit stone. As of 2026, the best results continue to be achieved with patience and precise technique.
Common Sharpening Mistakes to Dodge
Even with the best intentions, certain common mistakes can sabotage your sharpening efforts, leaving your knife still dull or even damaged. One prevalent issue is inconsistency in the sharpening angle. If the angle shifts significantly during a stroke, you end up with an uneven edge that won't perform optimally.
It’s like trying to sand a piece of wood with a tilted block, you get an uneven surface.
Another frequent error is applying too much pressure. While you need enough pressure to abrade the metal, excessive force can damage the fine edge you’re trying to create, or worse, cause the knife to slip, leading to injury. Some users also neglect to switch sides equally, leading to a blade that’s sharper on one side than the other, making it feel unbalanced.
Finally, failing to clean your knife and stones properly after sharpening can embed metal particles, dulling the edge or scratching the blade.
Who Needs What? Choosing the Right Sharpener for You
Deciding which sharpening method is best hinges on your needs, skill level, and how you use your knives. There isn't a one-size-fits-all answer, but understanding the strengths of each tool can guide your choice. Our research suggests most home cooks can benefit from a combination of tools for different purposes.
For the Daily Chef: Maintenance Masters
If you use your knives daily for general kitchen tasks and want to keep them in good working order between deeper sharpenings, a sharpening steel or honing rod is indispensable. This is your go-to for quick touch-ups. It's about maintaining the edge that’s already there.
For those who value efficiency and ease of use for actual sharpening, a good electric knife sharpener is a strong contender. They offer convenience and consistent results for most users without requiring a steep learning curve. Per aggregated user feedback, these can restore a usable edge in minutes.
For the Enthusiast: Mastering the Stone
If you’re passionate about cooking, appreciate precision tools, and enjoy a hands-on approach, investing time in learning to use whetstones is highly recommended. This method offers the highest degree of control and can achieve the sharpest possible edge, often surpassing what machines can do. It’s a skill that, once learned, provides a deep satisfaction and superior results, though it does require more dedication and practice.
For the Time-Crunched: The Electric Solution
For many home cooks, time is a precious commodity. An electric knife sharpener provides a fast and straightforward way to restore a dull edge. It takes the guesswork out of angle consistency, making it accessible to beginners.
While it may not achieve the absolute pinnacle of sharpness a skilled hand can produce with stones, it reliably sharpens most kitchen knives to a very functional level.
Frequently Asked Questions About Knife Sharpening
How often should I sharpen my knives?
It depends on usage, but a good rule of thumb is to hone your knives weekly or even before each use if you cook a lot. Sharpen them only when honing no longer brings back a keen edge. For most home cooks, sharpening might be needed every few months to a year.
Can I sharpen any knife?
Yes, most knives can be sharpened, including kitchen knives, pocket knives, and outdoor blades. However, some knives, like those with serrated edges or very delicate blades, might require specialized tools or techniques. Always check the manufacturer's recommendations for your specific knife.
Is it dangerous to sharpen a knife?
Yes, there are risks involved if proper safety precautions aren't followed. Always maintain a firm grip on both the knife and the sharpening tool. Keep your fingers away from the blade's path and ensure your workstation is stable to prevent slips.
Never rush the process.
What's the difference between sharpening and honing?
Honing realigns the existing microscopic edge of the blade without removing metal, essentially straightening it. Sharpening, on the other hand, actually grinds away metal to create a new, sharp edge. Honing is for maintenance of a sharp edge; sharpening is for restoring a dull one.